Choosing the best international flower delivery service for your needs
My cousin spent three days trying to get a birthday bouquet to her college roommate studying abroad in Lisbon. She tried a big-name American florist site, watched the price double at checkout with “international handling fees,” then got an email two days later saying the order couldn’t be fulfilled in that postal code. It’s a common story. Sending flowers across borders sounds simple until you actually try it, and that’s when most people discover how fragmented and confusing this industry really is.
Why sending flowers overseas isn’t like ordering a local bouquet
Domestic flower delivery in the US runs on a pretty mature network – wire services, regional growers, same-day courier partnerships. Cross international borders, though, and you’re suddenly dealing with customs regulations, different flower availability by climate and season, currency conversion, and local florists who may not even use the same online booking systems as US-based platforms. A rose that’s in full bloom and cheap in Colombia might be a luxury import in Japan. A florist in rural France might not have a website at all – they rely on regional wholesalers and phone orders.
This is why picking the right service matters so much more than people expect. It’s not just about pretty pictures on a website. It’s about whether the company actually has boots-on-the-ground relationships with florists in the destination country, or whether they’re just relaying your order through three middlemen and hoping for the best.
What actually separates a reliable service from a risky one
Local florist networks versus drop-shipping
Some platforms genuinely partner with independent florists in the destination city – meaning your bouquet is arranged fresh, locally, on the day of delivery. Others act more like brokers, forwarding your order to whichever supplier is cheapest that week, with no direct accountability if something goes wrong. I’ve found that asking a simple question before ordering – “who actually arranges and delivers this?” – tends to reveal a lot. If a company can’t answer clearly, that’s a red flag.
Transparent pricing (and the fees nobody mentions upfront)
Watch out for services that show one price on the search page and add a “service fee,” “delivery surcharge,” and “currency conversion fee” only at the final checkout screen. This is one of the most common complaints among people who’ve tried ordering internationally. A legitimate operator will show a final, all-in price before you commit, in your home currency, without surprise math at the end.

Delivery guarantees that mean something
“Same-day delivery” claims are easy to make and hard to verify from another continent. Look for services that specify actual delivery windows, offer tracking or confirmation photos, and have a clear refund or redelivery policy if the recipient isn’t home or the flowers arrive damaged. Time zones matter here too – a company promising same-day delivery to Sydney needs to actually understand what “same day” means when it’s already tomorrow there.
| Factor | Reliable service | Risky service |
|---|---|---|
| Florist relationship | Direct partnership, verified locally | Unknown third-party reseller |
| Pricing | All-in price shown upfront | Hidden fees at checkout |
| Delivery proof | Photo confirmation or tracking | No verification offered |
| Customer support | Reachable across time zones | Email-only, slow response |
A few things I’ve learned the hard way
- Always check what flowers are actually in season in the destination country – a “custom” bouquet request for tulips in Manila in August is going to be a problem no matter who you order from.
- Confirm the recipient’s full address format matches local conventions; postal systems abroad don’t always follow the US street-number-then-name pattern, and a florist may not catch the error until delivery day.
- Ask about substitution policies. Nearly every florist reserves the right to swap flowers of similar value if something isn’t available – this isn’t a scam, it’s standard practice, but you should know it’s coming.
Kind of a side note, but worth mentioning: services that specialize specifically in cross-border delivery tend to handle these nuances better than general e-commerce florists that just added an “international” tab to their site. When my sister was researching this after her own delivery mishap, she ended up comparing a handful of dedicated platforms, and it became clear that the ones treating international delivery as their core business – not an afterthought – were far more consistent. That’s really the heart of choosing a best international flower delivery service for your specific situation: match the platform’s actual specialty to what you need, rather than assuming every florist website works the same way everywhere.
Matching the service to the occasion
A sympathy arrangement needing next-day delivery in a small German town has very different requirements than a birthday bouquet for someone in central Tokyo who can receive same-day courier service. For remote or smaller towns, prioritize services with wide local florist networks rather than big-city courier fleets. For major metro areas, same-day guarantees and photo confirmation become realistic expectations you can actually hold the company to.
Where this leaves you
Sending flowers internationally doesn’t have to be a gamble. The key is looking past the homepage photos and checking for real local partnerships, honest pricing, and delivery accountability. Ask questions before you order, not after something goes wrong. If you’re planning a delivery for an upcoming birthday, anniversary, or just because, take twenty minutes to compare a couple of options using the criteria above – it’s a small step that saves a lot of frustration later.
A guide to growing cut flowers in your backyard
The first summer I grew zinnias for cutting, I planted them too close together, forgot to pinch them, and still ended up with enough blooms to fill every jar in my kitchen for weeks. That experience taught me something important: growing cut flowers is far more forgiving than most people think. You don’t need acres of land or a horticulture degree. A sunny patch of backyard, some decent soil, and a handful of the right seeds will get you surprisingly far.
This guide walks through the entire process – from picking your spot and preparing the ground to harvesting stems that actually last in a vase. Whether you’re gardening in Zone 4 Minnesota or Zone 9 Texas, the fundamentals stay the same. Let’s dig in.
Why a cut flower garden is different from a regular flower bed
Most ornamental gardens are designed to look beautiful in the ground. A cutting garden, on the other hand, is designed to be harvested. That single distinction changes everything – plant selection, spacing, layout, and maintenance all shift when your goal is bringing blooms indoors.
In a cutting garden, you want:
- Long, sturdy stems – at least 12 to 18 inches – so flowers look proportional in arrangements
- Extended vase life – some flowers wilt within hours after cutting, while others hold up for 7 to 10 days
- Repeat blooming – varieties that produce more flowers the more you cut them
- A mix of roles – focal flowers, fillers, airy accents, and foliage for complete bouquets
Think of your cutting garden less like a display and more like a productive patch – rows work better than clusters, and beauty in the bed is secondary to beauty on the table.
Choosing the right spot (it’s simpler than you think)
Most popular cut flowers need one thing above all else: sunlight. Look for a spot that gets at least 6 to 8 hours of direct sun daily. South-facing areas tend to work well across most of the continental U.S.
Beyond sunlight, consider these factors:
- Wind exposure. Tall stems like delphiniums and snapdragons can snap in gusty spots. A fence, hedge, or building on the windward side helps.
- Water access. You’ll be watering regularly through summer. Being close to a hose bib saves time and frustration.
- Drainage. Standing water after rain is a red flag. Most cut flowers hate soggy roots. Raised beds solve drainage problems quickly.
- Proximity to your house. This one gets overlooked. If your cutting garden is a 5-minute walk away, you’re less likely to harvest at the ideal time – early morning – and less likely to notice pest problems early.
How much space do you actually need?
Here’s a number that surprises people: a plot as small as 4 feet by 8 feet – 32 square feet – can produce enough flowers for a fresh bouquet every single week from June through September. If you have more room, a 4-by-16-foot bed gives you the space to stagger plantings and grow a wider variety. But start small. You can always expand next year.
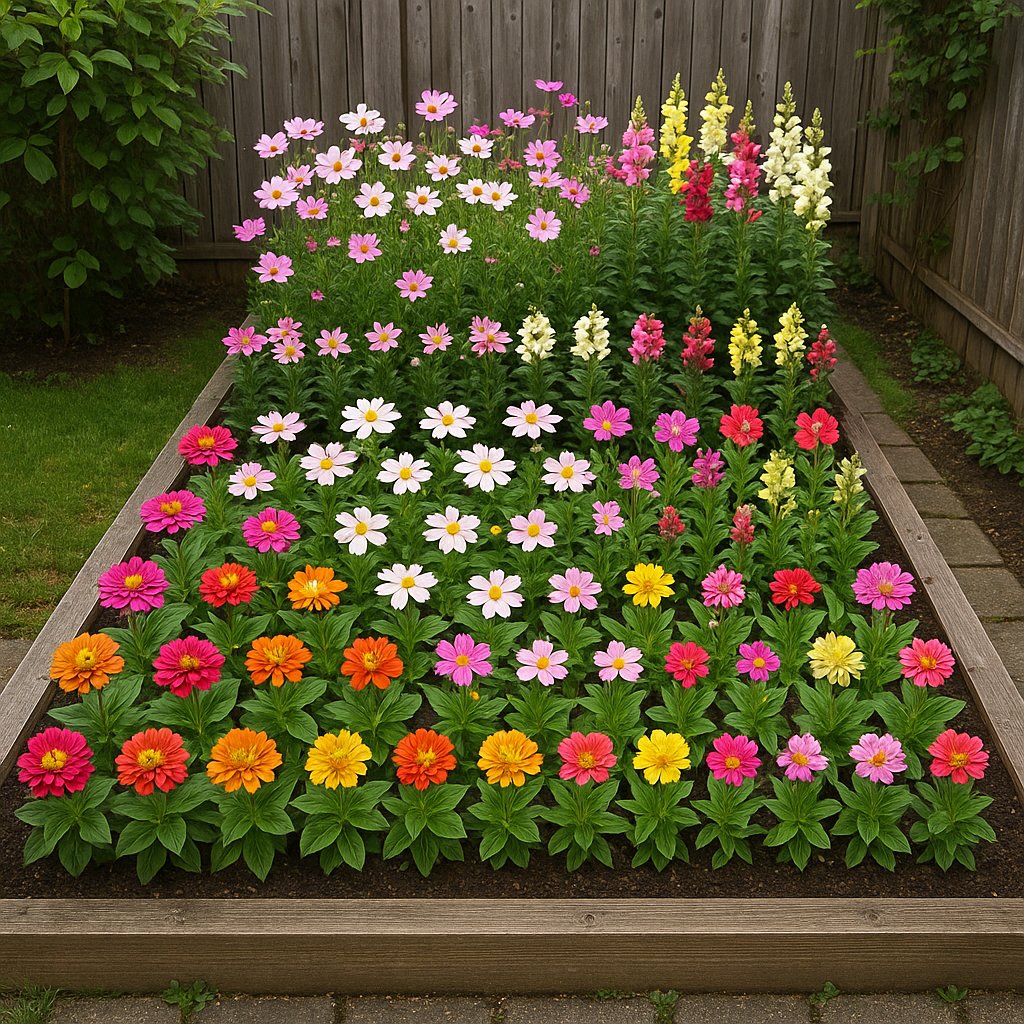
Soil preparation – the step that pays for itself all season
I’ve watched people spend $80 on specialty seeds and then plant them in compacted clay without amending it. That’s like buying premium fuel and pouring it into an engine with no oil. Soil is everything.
Here’s a straightforward approach that works in most backyard situations:
- Test your soil pH. Most cut flowers thrive between 6.0 and 7.0. Your local cooperative extension office (every state has one) can test your soil for a few dollars. It’s worth it.
- Add organic matter. Work 2 to 3 inches of well-aged compost into the top 8 to 10 inches of soil. This improves drainage in clay, water retention in sand, and fertility across the board.
- Use a balanced granular fertilizer. A 10-10-10 or similar all-purpose blend mixed in at planting time provides a solid nutritional base. Side-dress with compost or a diluted liquid fertilizer every 3 to 4 weeks during peak growing season.
One often-missed detail: avoid over-fertilizing with nitrogen-heavy products. Too much nitrogen produces lush foliage but fewer blooms – exactly the opposite of what you want.
What to plant: a practical selection strategy
Most competitor guides recommend annuals for beginners, and I agree – but I think the why matters more than the recommendation itself. Annuals complete their entire life cycle in one season. They bloom faster, produce more prolifically, and many of them actually increase flower production when you cut from them. They’re also inexpensive to grow from seed, so failures don’t hurt your wallet.
The backbone: reliable annuals for first-year growers
- Zinnias – the single most productive cut flower you can grow. The “Benary’s Giant” and “Queen Lime” series produce dinner-plate-sized blooms on 30-inch stems. Direct sow after your last frost date.
- Cosmos – airy, elegant, and virtually impossible to kill. Great for filler and volume in arrangements.
- Sunflowers – choose branching varieties like “ProCut” series for multiple stems per plant rather than one giant single head.
- Snapdragons – a cool-season star. Start seeds indoors 8 to 10 weeks before last frost. They bloom early, take light frosts, and add vertical structure to bouquets.
- Celosia – heat-loving and drought-tolerant. Varieties like “Chief Mix” produce stunning plume-shaped flowers that last over a week in water.
Don’t forget the supporting cast
A bouquet of all focal flowers can look flat. You need variety in form and texture. This is a gap I notice in many beginner guides – they list pretty flowers but skip the elements that make arrangements look professional.
- Fillers: Ammi majus (Bishop’s flower), feverfew, statice
- Textural accents: Amaranthus (love-lies-bleeding), ornamental grasses, nigella seed pods
- Greenery: Eucalyptus (in warmer zones), basil (yes, regular basil), dusty miller, bells of Ireland
A good rule of thumb: for every three focal flower varieties, plant at least two filler or accent varieties.
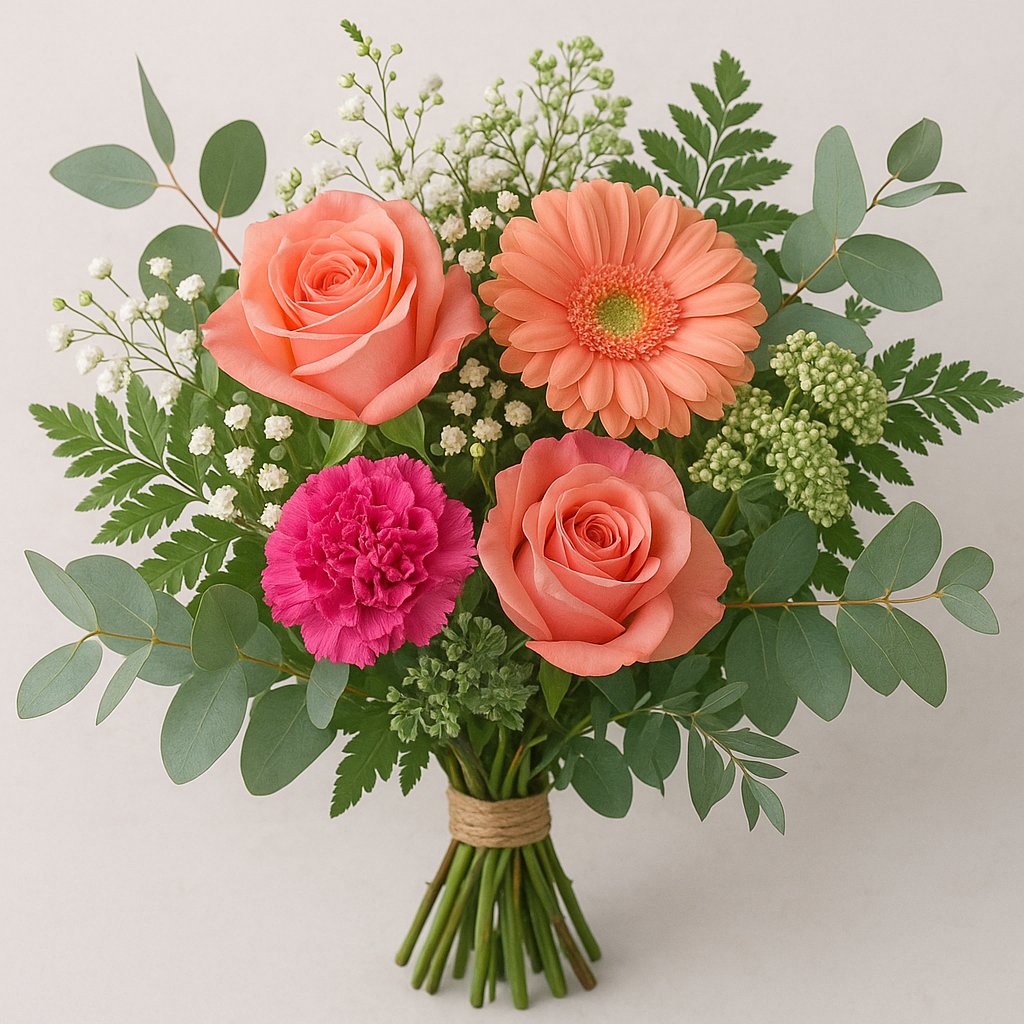
Seeds vs. transplants – and when to start each
Some flowers do best when sown directly into the garden. Others need a head start indoors. Here’s a quick breakdown:
Direct sow outdoors after last frost: zinnias, cosmos, sunflowers, marigolds, celosia. These resent root disturbance and germinate quickly in warm soil.
Start indoors 6 to 10 weeks before last frost: snapdragons, stock, lisianthus, dahlias (from seed), strawflowers. These need more time to reach blooming size.
Plant as bulbs or tubers: dahlias, ranunculus, anemones. Dahlias go in after your last frost; ranunculus and anemones typically get pre-sprouted and planted earlier, depending on your zone.
One technique that makes a massive difference: succession planting. Instead of sowing all your zinnia seeds at once, plant a batch every two to three weeks from late spring through early summer. This staggers bloom times so you aren’t drowning in flowers for two weeks and then have nothing for the rest of August.
Maintenance that actually matters: pinching, staking, and deadheading
Three tasks will dramatically increase your harvest. None of them take much time, but all of them are easy to skip – and skipping them is the most common mistake I see beginners make.
Pinching
When plants like zinnias, cosmos, snapdragons, and dahlias are about 10 to 12 inches tall, cut the main stem back to just above a set of leaves. This feels counterintuitive – you’re cutting off perfectly healthy growth. But pinching forces the plant to branch out, producing multiple flowering stems instead of just one. The result? Three to four times more blooms per plant.
Staking and support
Tall stems loaded with flowers will topple, especially after rain. The easiest support method for a backyard garden is the “corral” approach: pound four stakes at the corners of your bed and run horizontal netting (like Hortonova or even simple garden twine) at 12-inch intervals as plants grow. The stems grow up through the grid and stay upright naturally.
Deadheading
If you miss cutting a flower and it goes to seed, the plant thinks its job is done and slows down production. Remove spent blooms regularly to keep the plant focused on producing new flowers. This is especially critical with zinnias, sweet peas, and cosmos.
Harvesting and conditioning – where most vase life is won or lost
You can grow the most stunning dahlias in your neighborhood, but if you harvest them wrong, they’ll droop within 24 hours. Here’s how to do it right:
- Cut in the early morning or late evening – stems are fully hydrated and ambient temperatures are cool.
- Bring a bucket of cool water to the garden. Plunge stems in immediately after cutting. Don’t let them sit on the grass or a bench while you keep harvesting.
- Cut at the right stage. This varies by flower. Zinnias should be fully open with a firm center (wiggle the stem – if the head wobbles, it’s not ready). Sunflowers are best cut when petals have just started to lift off the face. Snapdragons should have the bottom third of florets open.
- Strip foliage below the waterline. Leaves submerged in vase water decompose rapidly and breed bacteria, which clogs stems and shortens life.
- Let stems rest in cool water for at least 2 hours in a dark, cool spot before arranging. Professionals call this “conditioning,” and it can add 3 to 5 days to vase life.
A tablespoon of bleach per gallon of vase water keeps bacteria in check – it’s more effective than most commercial flower food packets, and you already have it in your laundry room.
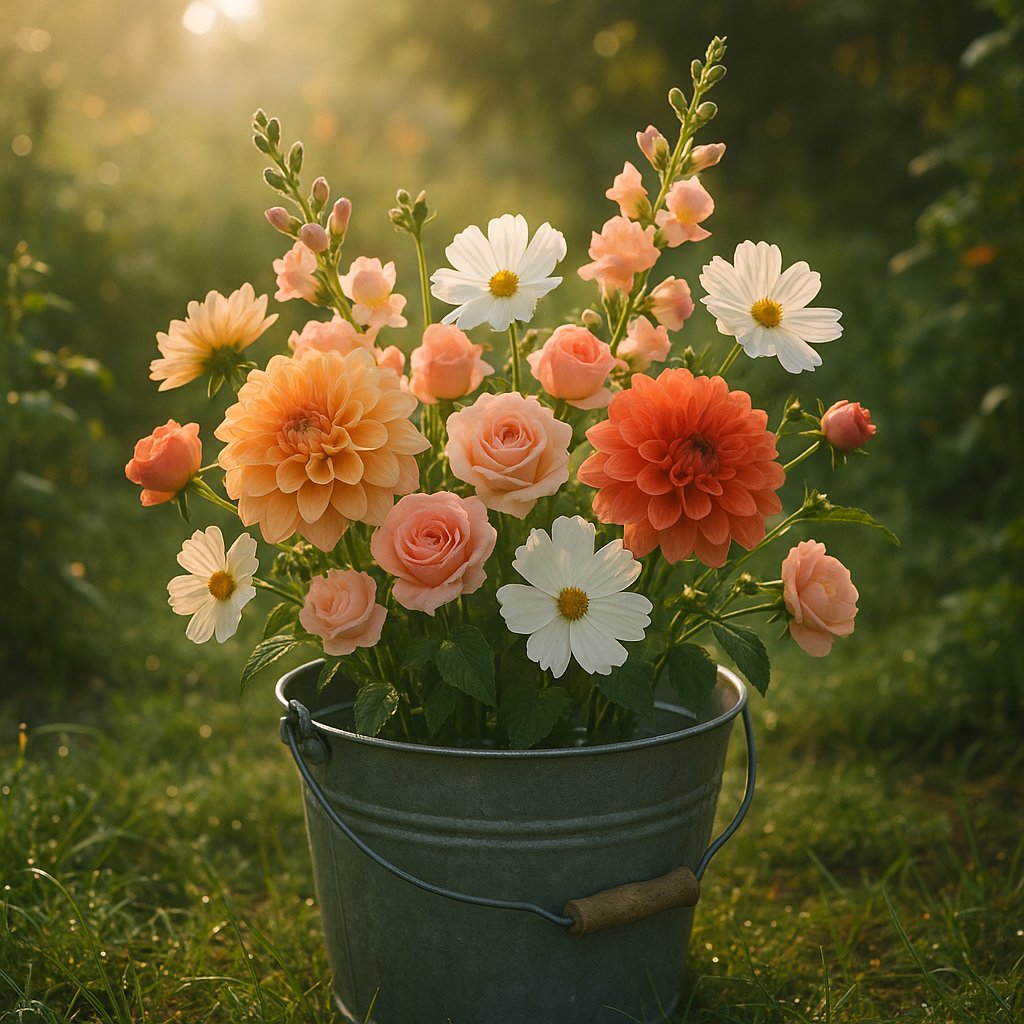
Extending the season: blooms from spring through hard frost
One area most guides skip entirely is how to stretch your cutting season beyond the typical July-through-September window. With a little planning, you can have homegrown bouquets for five or even six months.
- Early spring (March–May): Plant cool-season crops like sweet peas, stock, ranunculus, and Iceland poppies. In Zones 7 and above, these can go in during fall for spring bloom.
- Summer peak (June–August): Zinnias, dahlias, sunflowers, lisianthus, and celosia carry the bulk of the season.
- Late season (September–October): Dahlias peak in fall. Strawflowers and statice keep going until hard frost. Ornamental grasses and seed heads add texture even as annuals fade.
Succession planting, mentioned earlier, is your single most powerful tool here. Combined with a mix of cool-season and warm-season varieties, it turns your small patch into a near-continuous production system.
Your backyard bouquets start with a single weekend
Growing cut flowers is one of those rare gardening pursuits where the learning curve is gentle and the rewards come fast. You don’t need perfection – you need to get seeds in the ground and stay consistent with a few key practices like pinching, watering, and harvesting at the right time.
Start with three or four easy annuals this season. Pay attention to what thrives in your specific conditions. Keep notes – even rough ones – about what bloomed when and how long it lasted in a vase. That firsthand knowledge, accumulated over just one or two seasons, will be more valuable than any guide. And the jar of zinnias on your kitchen table? That’ll be the part that makes it all worthwhile.
Why some flowers close their petals at night (nyctinasty)
Walk past your garden tulips at 9 PM and they look like a completely different plant than they did at noon. Petals pulled tight, colors muted, the whole bloom folded in on itself like a closed umbrella. By morning, everything opens again as if nothing happened. If you’ve ever caught this in action, you’ve witnessed nyctinasty – one of the most quietly fascinating behaviors in the plant world.
But here’s what stuck with me: this isn’t random. It’s not wilting, it’s not dying, and it’s not a sign that something is wrong. It’s a deliberate, rhythmic movement that certain species have been performing for millions of years. And the reasons behind it are more nuanced – and more debated – than most articles let on.
What exactly happens inside a closing flower?
The word “nyctinasty” comes from the Greek nyx (night) and nastos (pressed close). But the name only tells you when it happens, not how. The mechanics are genuinely elegant.
At the base of each petal – and in leaf-closing species, at the base of the leaf stalk – there’s a swollen region of cells called the pulvinus. Think of it as a biological hinge. When darkness falls, potassium and chloride ions shuttle out of cells on one side of the pulvinus. Water follows those ions through osmosis, and those cells lose turgor pressure. The cells on the opposite side stay plump. That differential pressure literally bends the petal inward.
Come morning, the process reverses. Light triggers ion channels to open, water floods back in, and the petals unfurl.
What makes this especially interesting is that it’s not purely a response to light. Research going back to the 18th century – the French astronomer Jean-Jacques d’Ortous de Mairan noticed it in 1729 with mimosa plants – has shown that these movements persist even in continuous darkness. The plant has an internal circadian clock. Light is the primary signal that synchronizes the rhythm, but the oscillation itself is endogenous. Remove the light cue entirely, and the opening-closing cycle continues for several days before gradually drifting out of sync.

The “why” is more complicated than you’d think
Most sources settle on one or two explanations for why flowers evolved this behavior. The real picture involves several overlapping hypotheses, and honestly, botanists still argue about which ones carry the most weight.
Pollen protection
This is the leading hypothesis. Pollen grains are vulnerable to moisture – dew, rain, and the general humidity spike that often comes after sunset. Wet pollen doesn’t transfer effectively to pollinators. By closing up, the flower shields its reproductive material through the dampest hours. A 2019 study on Crocus published in the Annals of Botany found that flowers prevented from closing had significantly lower pollen viability after a single dewy night compared to control plants that closed normally.
Thermal regulation
Closed petals create a microenvironment that can be measurably warmer than the surrounding air. For species that bloom in early spring – crocuses, tulips, certain Adonis species – this matters. The developing ovules and stamens are kept a few critical degrees above ambient temperature. Some researchers have measured a 3–5°F difference inside a closed tulip versus the outside air on a cold April night.
Pollinator economics
Here’s an angle that doesn’t get enough attention. If a flower stays open at night but its pollinators are diurnal (active during the day), then those open petals are essentially an unattended buffet for nocturnal visitors – beetles, moths, or other insects that feed on pollen and nectar without efficiently pollinating the flower. Closing eliminates the freeloaders. It’s a way of making sure the flower’s resources only go to the insects most likely to carry pollen to another bloom of the same species.
Predation and herbivory
Petals and reproductive structures are nutritious. Some researchers suggest that closing reduces the visual and olfactory signal that attracts nocturnal herbivores. A tightly closed bud is harder for a beetle to chew into than a wide-open flower. This hypothesis is harder to test directly, but it aligns with what we see in species growing in habitats with heavy insect herbivory.
Not all petal movement is nyctinasty
This is a point that gets muddled frequently. Several related phenomena look similar to the casual observer but involve different mechanisms:
- Photonasty – movement triggered directly by light intensity changes, without an underlying circadian component. The flower simply responds to brightness. If you put a photonastic flower in constant light, it stays open. A nyctinastic flower in constant light will still attempt to close on schedule.
- Thermonasty – movement driven by temperature. Tulips are partly thermonastic: warm your tulip with a heat lamp at night, and it’ll open. But research shows a circadian component layered on top of the temperature response, making tulips a hybrid case.
- Seismonasty – movement triggered by touch or vibration, like the famous sensitive plant (Mimosa pudica). Totally different trigger, though the pulvinus mechanism is similar.
The distinctions matter because they affect how your plants behave in different environments. If you grow tulips indoors under constant artificial light and steady temperature, don’t be surprised if their opening-closing rhythm becomes irregular or disappears. They need the daily swing of light and temperature to keep the clock calibrated.

Seven common nyctinastic species you can observe in your own yard
You don’t need a botanical garden for this. Many popular garden plants across USDA zones 4–9 exhibit noticeable petal movement:
- Tulips (Tulipa spp.) – One of the most dramatic closers. The response is partly temperature-driven, so you can even watch it happen in real time by bringing a cut tulip from a cool porch into a warm room.
- California poppies (Eschscholzia californica) – Close tightly on cloudy days too, not just at night. A true light-responsive closer.
- Purple shamrock (Oxalis triangularis) – Both the leaves and flowers fold. The leaf movement is especially fun to watch – they droop like little sleeping umbrellas.
- Crocus (Crocus spp.) – Spring crocuses snap shut remarkably fast as shadows lengthen.
- Morning glory (Ipomoea purpurea) – Opens at dawn, spent by afternoon. Not exactly classic nighttime closing, but a clear example of light-synchronized petal behavior.
- Gazania (Gazania rigens) – Stays stubbornly shut on overcast days, which frustrates some gardeners but makes perfect evolutionary sense.
- Moss rose (Portulaca grandiflora) – Full sun only. These petals won’t budge without direct light.
What Darwin got right – and what we’re still figuring out
Charles Darwin devoted an entire book to plant movement – The Power of Movement in Plants (1880), co-authored with his son Francis. He meticulously documented the sleep movements of dozens of species and concluded that the behavior must offer some protective advantage, likely against cold. He was on the right track, but he didn’t have access to the molecular tools we have now.
Today, researchers have identified specific clock genes – like LHY and TOC1 – that regulate circadian rhythms in plants. They’ve traced the signaling pathway from photoreceptors (phytochromes and cryptochromes that sense red and blue light) down to the ion channels in the pulvinus. But significant gaps remain. We still don’t fully understand why closely related species in the same genus sometimes differ – one closes at night, the other doesn’t. And the ecological cost-benefit math is hard to pin down precisely: how much energy does the movement itself consume, and does the protection gained always outweigh that cost?
A 2021 paper in New Phytologist proposed that nyctinasty may also play a role in water conservation – closed petals reduce transpiration from the petal surface during the hours when photosynthesis isn’t happening anyway. It’s a compelling idea, especially for species in arid habitats, though more field data is needed. Ongoing work as of 2025 and into 2026 continues to refine these models, with several research groups using thermal imaging and real-time ion-flux sensors to quantify the energetic costs and benefits of petal closure under field conditions.
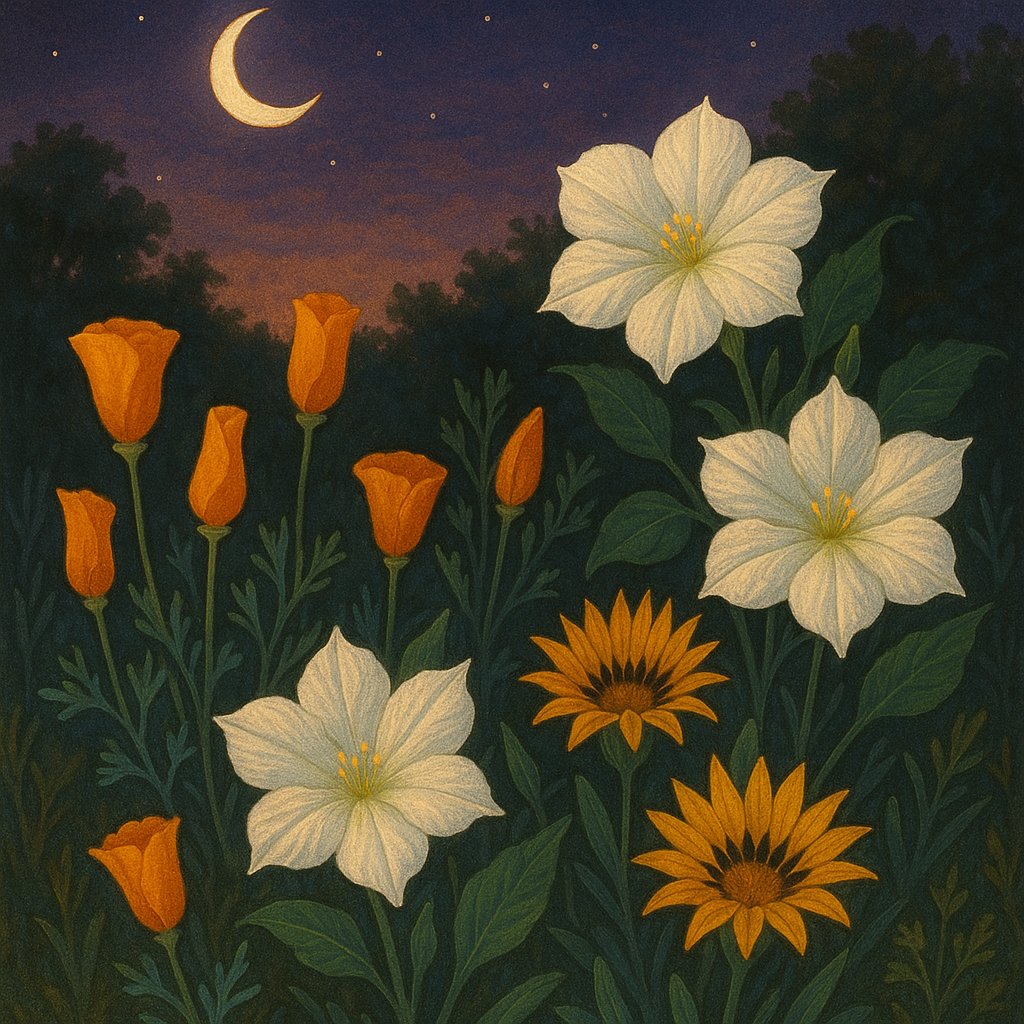
A simple experiment you can try this weekend
If you want to see circadian plant movement with your own eyes – and prove it’s not just a light reaction – try this with a potted Oxalis or a cut tulip:
- Place the plant in a room with a regular light-dark cycle for two days so it synchronizes.
- On the third evening, move it into a dark closet and leave it there.
- Check every few hours. You’ll notice it still opens roughly on schedule the next “morning,” even in total darkness.
- By the second or third day in constant darkness, the rhythm starts to drift – the “waking” time shifts later each cycle, usually by 30–90 minutes per day.
This tells you something profound: the plant isn’t just passively reacting to its environment. It’s keeping time internally, anticipating dawn before it arrives.
What this means for the way we think about plants
Nyctinasty challenges the default assumption that plants are static, passive organisms. They’re not. They track time, anticipate environmental changes, and execute coordinated mechanical responses. The more you observe these rhythms – really watch them – the more you start to appreciate that a garden is full of quiet, slow-motion activity that most of us walk right past.
If this topic has piqued your curiosity about the hidden lives of flowers, the team at Orlaya Flora shares a wealth of insights into plant behavior, seasonal bloom patterns, and species-specific growing guidance that goes well beyond the basics. It’s a good next stop for anyone who wants to dig deeper into what their flowers are actually doing when we’re not watching.
Flowers in space: experiments with plant growth on the International Space Station
In January 2016, astronaut Scott Kelly posted a photo on social media that stopped people mid-scroll. It was an orange zinnia – bright, delicate, unmistakably alive – blooming aboard the International Space Station. The image felt almost surreal: a flower, something we associate with backyards and window boxes, floating 250 miles above Earth in a place where nothing is supposed to grow without a fight.
That zinnia wasn’t just pretty. It represented decades of painstaking research, failed attempts, mold outbreaks, and creative problem-solving. And it marked a turning point in how we think about growing plants beyond our planet – not just for food, but for the psychological well-being of humans who may one day spend years traveling to Mars.
Here’s a closer look at how flowers and plants have become a serious area of scientific inquiry aboard the ISS, what we’ve learned so far, and why it matters for life both in orbit and back on the ground.

Why bother growing flowers in orbit?
It’s a fair question. When you’re spending roughly $20,000 per pound to ship cargo to the ISS, why dedicate precious space and crew time to flowers? The answer is twofold – and neither part is trivial.
The science case
Flowering represents a complex stage in a plant’s life cycle. If researchers can get a plant to flower and produce seeds in microgravity, it means they can potentially close the loop on space agriculture – growing multiple generations of crops without needing to send new seeds from Earth. That’s essential for any long-duration mission to Mars or beyond, where resupply simply isn’t an option.
Flowers also serve as biological indicators. The way a plant develops buds, opens petals, and responds to light in zero-g tells scientists a great deal about how fundamental biological processes – hormone signaling, gravitropism, water transport – work when you remove gravity from the equation. Some of these insights have implications for agriculture back on Earth, particularly in understanding how plants respond to environmental stress.
The human case
Astronauts consistently report that tending plants is one of the most calming, grounding activities they can do in space. Don Pettit, who unofficially grew zucchini and sunflowers during Expedition 31 in 2012, kept a blog written from the plants’ perspective. It became a quiet internet sensation. The psychological value of watching something green and alive grow in an otherwise sterile, mechanical environment is hard to overstate.
NASA behavioral scientists have noted that as missions get longer – the current record for an American astronaut is 371 consecutive days – the need for what they call “Earth analogs” becomes more urgent. A small garden, even one that fits inside a container the size of a carry-on suitcase, can help combat the isolation and sensory monotony of spaceflight.
The hardware: Veggie, APH, and the gardens that made it possible
Growing anything in space requires solving problems that simply don’t exist in a terrestrial garden. Water doesn’t drain. It forms floating blobs. Roots can’t “feel” which way is down. Air doesn’t circulate naturally. Every one of these challenges required purpose-built hardware.
Veggie – the workhorse
The Vegetable Production System, nicknamed Veggie, arrived on the ISS in 2014. It’s deceptively simple: a flat panel of red, blue, and green LEDs mounted above a set of plant “pillows” – small bags filled with a clay-based growth medium and controlled-release fertilizer. Seeds are pre-planted in these pillows on the ground, and astronauts just add water and light once they’re in orbit.
Veggie’s footprint is about the size of a small microwave oven. It doesn’t have much environmental control – no humidity regulation, no closed-loop CO₂ management. That simplicity is actually the point. NASA wanted to learn whether plants could handle the ambient conditions of the station, which typically sits around 40–60% humidity with CO₂ levels significantly higher than Earth’s atmosphere (often 2,000–5,000 ppm, compared to roughly 420 ppm on Earth).
The first lettuce crop from Veggie (the VEG-01 experiment) was harvested in 2014 but wasn’t eaten until 2015, after ground teams confirmed it was safe. Since then, crews have grown red romaine lettuce, Tokyo bekana cabbage, mizuna mustard, kale, and – most famously – zinnias.
Advanced Plant Habitat – the precision lab
Where Veggie is a stripped-down garden box, the Advanced Plant Habitat (APH) is a fully enclosed, automated growth chamber. Installed in 2017, it controls temperature, humidity, oxygen, and CO₂ levels independently. It has over 180 sensors and a water recovery system. Its LED array can be programmed to simulate different day lengths and light spectra.
APH was designed for experiments where precise conditions matter – genetic studies, for instance, or investigations into how specific environmental variables affect flowering. The PH-02 experiment used APH to grow radishes, allowing scientists to compare their genetic expression in microgravity to identical plants grown in identical chambers at Kennedy Space Center. The results showed measurable differences in gene activity related to stress responses and nutrient uptake.

XROOTS – ditching the soil entirely
One of the more recent innovations, the eXposed Root On-Orbit Test System (XROOTS), tested hydroponic and aeroponic techniques on the station. The idea was to figure out whether soilless growing methods – which are already common in commercial agriculture on Earth – could scale up for space. Early results were promising, with plants developing healthy root systems without any traditional growth medium.
The zinnia story: when things go wrong (and right)
The VEG-01D zinnia experiment in late 2015 is one of the most instructive episodes in space botany – not because everything went smoothly, but precisely because it didn’t.
Zinnias were chosen because they’re more challenging than lettuce. They need 60 to 80 days to flower (compared to about 28 for lettuce), and they’re sensitive to light, water, and air circulation. NASA wanted to test whether a long-growth-cycle flowering plant could survive the ISS environment.
About two weeks in, things started going sideways. The leaves began curling and showing signs of overwatering. Then mold appeared – Fusarium, a common fungal pathogen. The crew was following a watering protocol designed by ground teams, but the on-orbit conditions were different enough that the schedule didn’t work. Water wasn’t evaporating or draining the way models predicted.
Scott Kelly, drawing on what he described as his own gardening intuition, asked Mission Control for permission to deviate from the set protocol. He got it. He began watering the plants based on his own assessment of soil moisture and leaf condition rather than a fixed schedule. Some plants died. But others recovered. And on January 12, 2016, the first zinnia bloomed in space.
That episode changed how NASA thought about crew autonomy in plant care. The agency realized that for future long-duration missions, astronauts would need to act more like farmers than lab technicians – making judgment calls based on what they see, not just what a protocol says.
What space botany teaches us about plants on Earth
The research has value that extends well beyond spaceflight planning. Here are three areas where ISS plant experiments have contributed to terrestrial science:
- Stress genetics: Plants in microgravity activate stress-response genes that are also triggered by drought, salinity, and extreme temperatures on Earth. Studying these pathways in the “clean” environment of space – where gravity is removed as a variable – helps geneticists isolate which genes do what.
- LED optimization: The LED research done for Veggie and APH has directly informed the rapidly growing indoor farming industry. The specific red-blue light ratios tested on the ISS are now used in commercial vertical farms across the United States.
- Water delivery systems: The capillary-based watering methods developed for microgravity have inspired more efficient irrigation designs for arid-climate agriculture, where every drop counts.
There’s also a less obvious connection. The work on symbiotic nitrogen fixation – explored through experiments with legumes aboard the station – could eventually influence how we reduce fertilizer dependency in conventional farming. If researchers can understand how plant-microbe partnerships function without gravity, they may unlock more efficient ways to harness those partnerships on the ground.
What comes next: flowers on the Moon and beyond
With NASA’s Artemis program working toward a sustained human presence on the lunar surface, plant growth is already part of the planning. The challenge on the Moon is different from the ISS: there’s about one-sixth Earth’s gravity (not zero), intense radiation, and lunar regolith that’s chemically hostile to most plant roots. Researchers at the University of Florida have already shown that plants can germinate in actual lunar soil brought back by the Apollo missions, though the plants were visibly stressed and grew poorly.
For Mars – with a transit time of roughly seven months each way – the focus shifts to closed-loop food production systems. A crew of four would need thousands of calories daily, and current estimates suggest that growing even 25–30% of their food on board could dramatically reduce launch mass and improve morale. Flowering crops like tomatoes, peppers, and strawberries are on the candidate list because they offer both nutrition and variety.
The beauty of the ISS experiments is that they’re building a knowledge base, one crop cycle at a time. Every zinnia that wilts, every radish that thrives, every legume that forms a nitrogen-fixing nodule in zero-g adds a data point that brings future space gardens closer to reality.

Earth gardens, space thinking
There’s something quietly profound about the connection between space botany and the simple act of growing flowers at home. The same principles that NASA researchers wrestle with – light quality, water management, root health, environmental stress – are exactly what any attentive gardener thinks about, just at a different scale.
If you’re someone who finds this intersection of science and horticulture fascinating, it’s worth exploring how deeper knowledge of plant biology can inform your own growing practices. Resources like Orlaya Flora offer a thoughtful perspective on understanding flowers – their needs, their biology, and the sometimes surprising ways they respond to care.
Whether the garden is in your backyard or orbiting 250 miles overhead, the fundamental relationship remains the same: pay attention to what the plant is telling you, adjust accordingly, and don’t be afraid to deviate from the script. Scott Kelly would approve.
Why some flowers bloom only at night
Picture this: it’s a warm July evening in your backyard. The sun has just dipped below the horizon, the crickets are warming up, and suddenly – a flash of white catches your eye. A tightly wound bud you’ve been watching for days is finally unfurling, petal by petal, releasing a scent so sweet it stops you mid-step. By morning, the flower will be gone.
I’ve watched this happen with a night-blooming cereus on my patio, and honestly, it felt like witnessing something that wasn’t meant to be seen. But here’s the thing – it absolutely was. Just not by me. That flower was performing for an entirely different audience, and every detail of its design – the color, the timing, the fragrance – was calibrated for creatures that come alive after dark.
So why do some plants skip the sunlit hours entirely? The answer is more layered than most articles will tell you. It’s not just about pollinators. It’s about survival strategy, water economics, evolutionary gambles, and a biological clock ticking inside every cell.
The pollinator argument – and why it’s only half the story
Most explanations start and stop here: nocturnal flowers bloom at night to attract nocturnal pollinators. Moths, bats, certain beetles. That’s true, but it undersells what’s actually happening.
Think about the daytime pollination market. It’s crowded. Bees, butterflies, hummingbirds, flies – they’re all competing for the same flowers, and those flowers are competing for the same pollinators. Now imagine a plant that sidesteps this entire frenzy by opening shop when the competition is asleep. Fewer pollinators are available at night, sure, but the ones that do show up – hawk moths, sphinx moths, nectar-feeding bats – have far fewer options. The relationship becomes almost exclusive.
This is what biologists call temporal niche partitioning. Instead of competing in a saturated daytime marketplace, night-blooming plants carved out their own shift. And they adapted every aspect of their biology to dominate it.
How nocturnal flowers “speak” to their pollinators
Color is the first giveaway. Notice how night-blooming flowers tend to be white, pale yellow, or cream? In low light, these colors reflect even faint moonlight, making the blooms visible to moths navigating by sight. Dark reds and blues – so attractive to daytime bees – would simply vanish in the darkness.
Then there’s fragrance. Nocturnal flowers don’t just smell nice – they are scent powerhouses. Evening primrose, tuberose, night-blooming jasmine – these plants pump out volatile organic compounds at concentrations that would be overkill during the day. Hawk moths can detect certain floral scents from over a quarter mile away. The flower doesn’t need to be seen first. It needs to be smelled first.
And the shapes tell a story too. Long, tubular corollas are common among night bloomers because they match the long proboscis of sphinx moths. The flower and the pollinator evolved together, each shaping the other over millions of years.
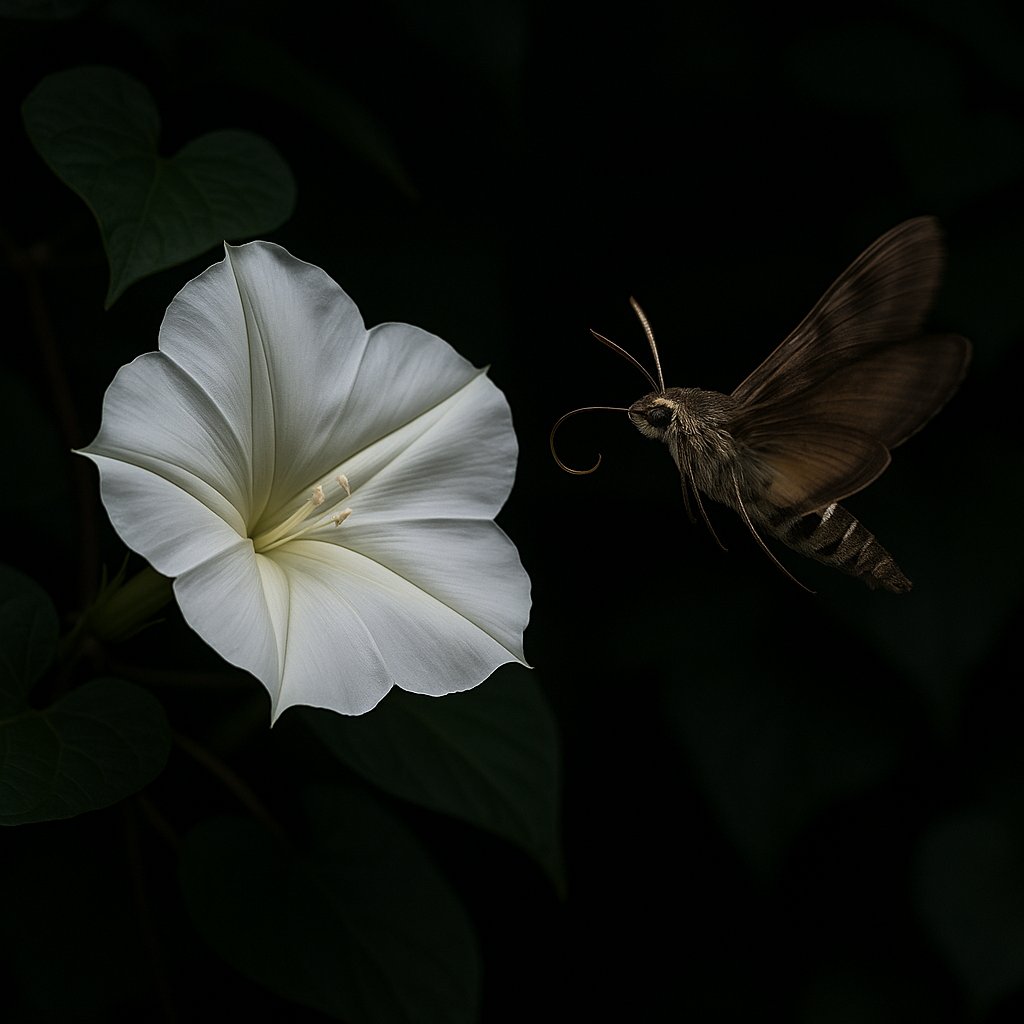
The clock inside the petals
Here’s something rarely explained in depth: flowers don’t simply “react” to darkness. They anticipate it. The mechanism is governed by circadian rhythms – internal biological clocks that cycle roughly every 24 hours, just like in humans.
In plants, these clocks are driven by a set of proteins that rise and fall in concentration throughout the day. Key among them are components of what scientists call the TOC1-CCA1 feedback loop (named after the genes involved in Arabidopsis research but present in various forms across flowering plants). Light resets this clock each morning, but the clock itself keeps running even in constant darkness – proving it’s truly internal, not just a reaction to external light.
What this means practically: a night-blooming cereus “knows” when evening is approaching hours before the sun sets. The biochemical cascade that softens cell walls in the petals, inflates them with water, and triggers scent production begins well in advance. By the time twilight arrives, the flower is ready.
Temperature and humidity play supporting roles
There’s a less-discussed but critical factor: water conservation. Many nocturnal bloomers evolved in arid or semi-arid environments – deserts, dry tropical forests, Mediterranean climates. Opening a flower is an act of water loss. Petals are essentially exposed moist tissue, and during hot, dry daytime hours, evaporation is ruthless.
By blooming at night – when temperatures drop, humidity rises, and evapotranspiration slows – these plants conserve precious moisture. The queen of the night cactus (Epiphyllum oxypetalum) is a perfect example. Native to Central American forests and adapted to dry conditions, it blooms for a single night, closes by dawn, and avoids the punishing midday heat entirely.
This isn’t just about the flower itself. Pollen viability also suffers in extreme heat. Some studies suggest that pollen grains from night-blooming species remain fertile longer because they avoid UV radiation and thermal stress. The plant isn’t just protecting petals – it’s protecting its reproductive future.
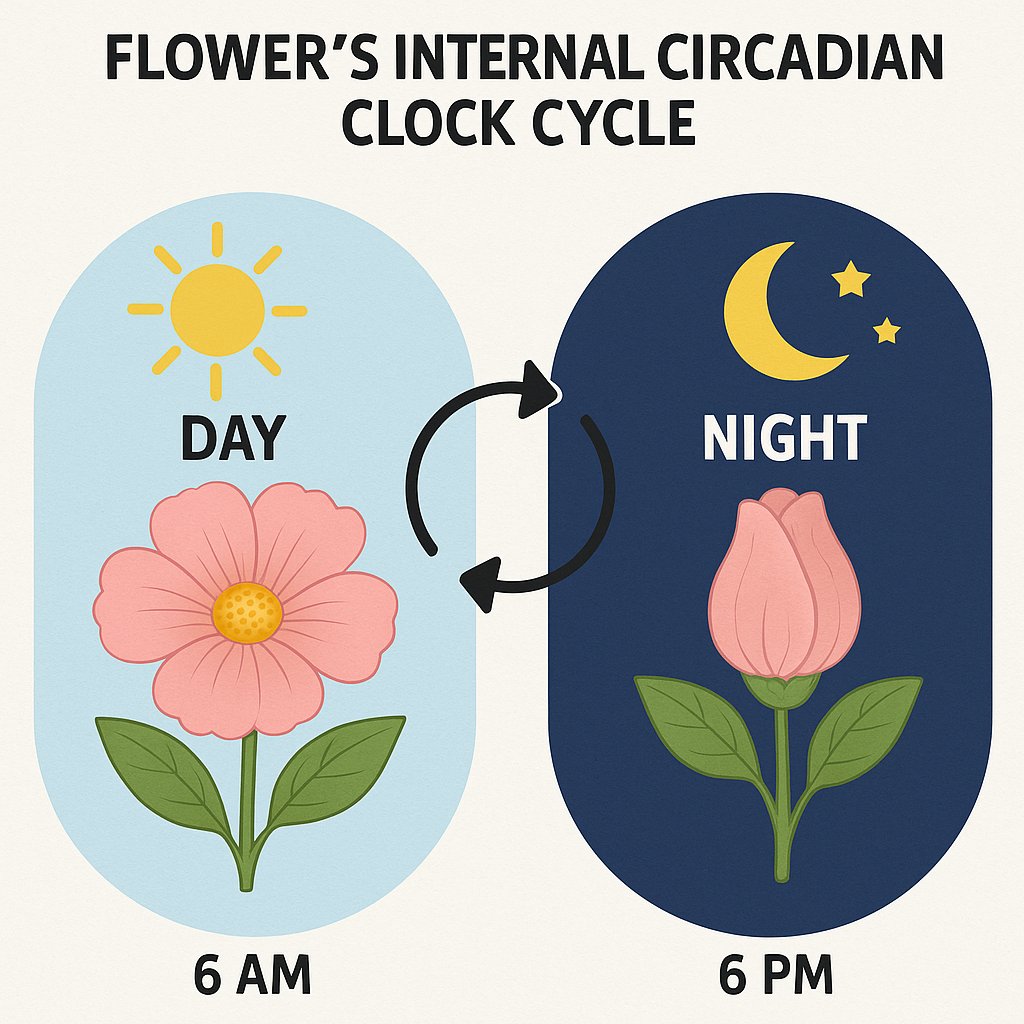
Night bloomers you might already have in your garden
Let’s move from theory to the plants themselves. Here are a few worth knowing – some common, some you might not have heard of:
- Moonflower (Ipomoea alba) – A vigorous vine across USDA zones 10–12 (annual elsewhere). Its 6-inch white trumpets open at dusk and close by mid-morning. Easy to grow from seed after nicking the hard coat.
- Evening primrose (Oenothera biennis) – Native to North America and often considered a weed, which is a shame. Its yellow flowers pop open in seconds at twilight – fast enough to actually watch in real time.
- Night-blooming jasmine (Cestrum nocturnum) – The fragrance on this one is almost too much. One bush can perfume an entire yard. Popular in the South but tender below zone 9.
- Four o’clocks (Mirabilis jalapa) – Not strictly nocturnal but crepuscular – they open in late afternoon and stay open through the night. Multicolored, carefree, and often self-seeding aggressively.
- Night-blooming cereus (multiple genera) – The dramatic one. Blooms once a year, for one night. Communities in the Southwest throw “cereus watching parties” to catch the event.
- Dragon fruit cactus (Hylocereus undatus) – Yes, the fruit you buy at the grocery store comes from a night-blooming cactus. The flowers are enormous, fragrant, and last a single night.
One species that deserves more attention is Zaluzianskya capensis, commonly called night phlox or “midnight candy.” Tiny star-shaped blooms, maroon on the back, white on the face, with a scent that genuinely smells like vanilla mixed with honey. It’s underused in American gardens and thrives in containers.
What light pollution is doing to nocturnal blooms
This is the angle almost nobody covers – and it matters.
Research published in Nature in 2017 found that artificial light at night (ALAN) reduced pollinator visits to certain nocturnal flowers by 62%. The light disrupts moth navigation, confuses circadian cues for both plants and insects, and can even suppress scent production in some species. A cabbage thistle study in Switzerland showed that fruit set dropped by 13% under artificial light conditions. Since that initial research, follow-up studies through 2025 have only reinforced the concern, with urban ecologists now listing ALAN as a measurable threat to plant-pollinator networks worldwide.
For gardeners growing night-blooming plants, this has practical implications. If your moonflower vine is planted directly under a porch light or near a street lamp, it may receive fewer pollinator visits – and if it’s a species that requires cross-pollination, that means fewer seeds and fruit.
Simple fixes: position night gardens away from strong artificial light, or use warm-toned, low-intensity lighting that’s less disruptive to moths. Red-spectrum lights are generally less attractive to insects than blue-white LEDs.
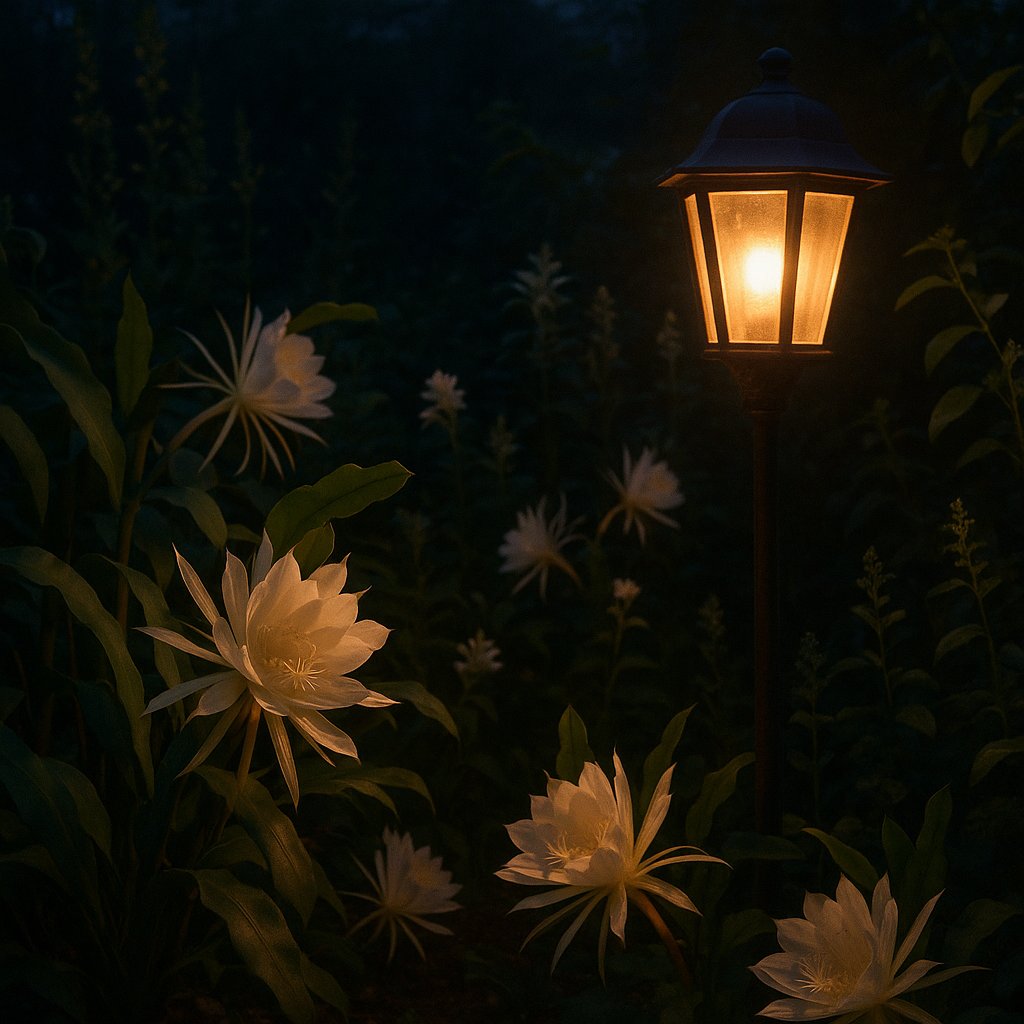
Bringing the night garden home
If you’re planning a moonlight garden – a space designed to come alive after sunset – think beyond just the flowers. Pair night bloomers with silver-leaved plants like Artemisia or lamb’s ear, which reflect moonlight and create a luminous backdrop. Add a water feature; the sound enhances the sensory experience once you can no longer rely on color.
Placement matters. Position night-blooming species near seating areas, bedroom windows, or paths you walk in the evening. The whole point is to be present when these plants do their work.
For those who want to explore the intersection of botanical knowledge and thoughtful garden design, understanding why a plant blooms when it does isn’t just academic – it changes how you build a garden that truly functions around the clock.
The bigger picture
Night-blooming flowers remind us that the natural world doesn’t operate on our schedule. These plants evolved their rhythms over millions of years, fine-tuning every detail – petal color, scent chemistry, bloom timing, water management – to thrive in a window most of us sleep through.
The next time you step outside after dark, pay attention. That faint sweetness in the air might be a plant that’s been waiting all day for this exact moment – not for you, but for a moth you’ll never see. And there’s something genuinely wonderful about that.
How to grow lavender from seeds in a temperate climate
Growing lavender from seeds in a temperate climate: a practical, no-nonsense guide
I killed three batches of lavender seedlings before I figured out what temperate-climate growers do differently. The first time, I followed a generic seed-packet guide — the kind written for someone gardening in Provence — and every single seedling rotted in my damp central Pennsylvania spring. The second time, I skipped stratification because an internet comment told me “fresh seeds don’t need it.” Germination rate: maybe 15%. The third time, damping off took the whole tray overnight. Absolutely crushing.
But here’s the thing. That fourth attempt? It worked. And now, six years later, I have a 40-foot lavender border that started from a single $4 seed packet. Most guides treat lavender as a Mediterranean plant and leave temperate gardeners to guess at timing, variety selection, and winter protection. This guide doesn’t. Every recommendation here targets USDA Zones 5–7 — the mid-Atlantic, Midwest, Pacific Northwest, and similar regions where summers are humid, winters bite, and lavender supposedly “shouldn’t” thrive. It does thrive. You just need the right playbook.
Fair warning: growing lavender from seed is slow. Seeds take weeks to germinate, seedlings grow at a pace that tests your patience, and most plants won’t bloom until their second summer. But one tray of seeds can yield 50–100 plants for under five dollars. That math kept me going — and honestly, I think the slowness makes the first bloom even sweeter.
Best lavender varieties for Zones 5–7 (and the ones to avoid)
Lavender variety selection determines whether your plants survive January or become compost by March. Not all lavender is created equal, and this is the single biggest mistake I see temperate gardeners make — buying whatever seeds look prettiest on the packet.
Hardy English lavender (Lavandula angustifolia) — the safe bet
English lavender handles cold winters, humid summers, and heavy soil better than any other species. These four varieties earn their reputation as workhorses for temperate growers:
| Variety | Species | Hardiness zone | Mature size | Bloom period | Germination (days) |
|---|---|---|---|---|---|
| ‘Munstead’ | L. angustifolia | 5–9 | 12–18 in. | June–July | 14–21 |
| ‘Hidcote’ | L. angustifolia | 5–9 | 12–16 in. | June–July | 14–21 |
| ‘Vera’ | L. angustifolia | 5–8 | 18–24 in. | June–Aug | 14–28 |
| ‘Ellagance’ series | L. angustifolia | 5–9 | 10–14 in. | Late June–Aug | 14–21 |
‘Munstead’ and ‘Hidcote’ are my go-to recommendations. ‘Munstead’ reaches 12–18 inches tall, tolerates Zone 5 winters reliably, and produces a clean, classic lavender scent. ‘Hidcote’ offers deeper purple blooms on a slightly more compact frame. ‘Vera’ — sometimes called “true lavender” — grows taller and makes an excellent hedge, though ‘Vera’ needs a bit more space. The ‘Ellagance’ series is newer, bred specifically for even first-year bloom potential from seed, and comes in purple, pink, and white.
Lavandins and Spanish lavender — beautiful but risky
Lavandula x intermedia varieties like ‘Grosso’ and ‘Provence’ tempt gardeners with their large flower spikes and intense fragrance. These lavandins can survive Zone 7 with excellent drainage and winter mulching, but they frequently die in Zone 5 and 6 winters. I lost a row of ‘Grosso’ in a single ice storm — the crowns rotted beneath frozen slush. Lavandula stoechas (Spanish lavender) is even less forgiving. Anything colder than Zone 7b will kill Spanish lavender outright. Skip it unless you’re treating the plants as annuals. Trust me on this one.
When to start lavender seeds in a temperate climate
Lavender seeds need a generous indoor head start — 10 to 12 weeks before your last expected frost date. That timing catches many gardeners off guard because it means starting seeds in the dead of winter. Zone 6 gardeners with a mid-May last frost date begin sowing indoors around late February to early March. Zone 5 growers with a late-May or early-June frost date can push the start to mid-March. Zone 7 gardeners often begin in mid-February.
Rushing seeds outdoors too early into cool, wet soil is the fastest way to lose them. Lavender seeds rot in soggy ground. Indoor sowing gives temperate gardeners control over moisture, temperature, and light — three variables that outdoor spring weather in Ohio or Oregon absolutely will not cooperate on.
Cold stratification — the step most beginners skip
What stratification actually does to lavender seeds
Lavender seeds evolved in climates with cool, moist winters. The embryo inside each seed stays chemically dormant until it experiences a sustained cold period — nature’s way of preventing germination during a warm autumn spell that would kill tender sprouts before real spring arrives. Cold stratification mimics that winter signal. Gardeners expose seeds to 35–40°F for 2–4 weeks, which breaks dormancy and dramatically improves germination rates. Without stratification, lavender seeds germinate at roughly 30%. With stratification, that number jumps to 60–80%. Not even close.
The damp paper towel method (step by step)
- Moisten a paper towel until damp but not dripping.
- Spread lavender seeds in a single layer across one half of the towel.
- Fold the towel over the seeds and slide the towel into a zip-lock bag.
- Label the bag with the variety name and the date.
- Place the bag in the refrigerator — not the freezer.
- Check the towel weekly and re-moisten the paper if drying occurs.
After 3–4 weeks, seeds are ready for sowing. An alternative approach: sow seeds in trays of moist seed-starting mix, cover the trays with plastic wrap, and refrigerate the entire tray. Both methods work. I’ve tested both over multiple seasons. The paper towel method uses less refrigerator space and makes it easy to spot seeds that begin sprouting early — which happens occasionally and always feels like a small miracle.
Sowing lavender seeds indoors — getting the details right
Soil mix for lavender seedlings
Lavender seedlings demand a light, fast-draining mix with slightly alkaline pH (6.5–7.5). A 50/50 blend of standard seed-starting mix and perlite creates the ideal texture. Avoid heavy potting soils packed with peat — those hold too much moisture and invite damping off. Sprinkle stratified seeds across the surface of the moistened mix. Press seeds gently into the surface with your fingertip. Do not bury them. Lavender seeds need light to trigger germination.
Light, temperature, and the waiting game
Lavender seeds germinate in 14–21 days at a steady 65–70°F. Healthy lavender seedlings need 12–14 hours of light daily — a basic T5 fluorescent shop light positioned 2–3 inches above the tray handles this perfectly. LED grow panels work too. A sunny windowsill alone usually isn’t enough in February, especially in northern zones where daylight hours are still short.
Now here’s where new growers panic. Day 10: nothing. Day 14: maybe one tiny sprout. Day 18: a few more. Lavender germinates irregularly and slowly. This is normal. Do not overwater out of anxiety. Mist the surface lightly or water from below by setting the tray in a shallow dish of water for 10 minutes. Let the surface dry between waterings. Soggy soil at this stage means death by fungus.
Transplanting seedlings to their outdoor home
Hardening off — the bridge between indoors and out
Lavender seedlings raised under artificial light have never felt wind, direct sun, or temperature swings. Hardening off takes 7–10 days and cannot be skipped. Start by placing trays outdoors in filtered light for 1–2 hours on a mild day. Increase exposure by an hour each day, gradually introducing direct morning sun. By day 7, seedlings can handle a full day outside. Skipping this process burns tender leaves, stunts root development, and sets plants back by weeks. I learned this the hard way with my very first successful tray — half the seedlings went white and crispy in a single afternoon of unfiltered May sun.
Choosing the right spot in a temperate garden
Lavender plants demand full sun — a minimum of 6 hours of direct light, though 8 or more is better. A south-facing slope is ideal because the grade sheds water and the exposure maximizes warmth. Avoid low spots where cold air pools on spring nights. Raised beds and gravel-amended borders mimic the rocky, fast-draining slopes of lavender’s native Mediterranean habitat. Space plants 12–18 inches apart. Transplant only after all frost danger has passed — mid-May in most Zone 6 gardens, late May in Zone 5.
Soil, water, and feeding — less is more
Lavender hates wet feet. In temperate climates where summer thunderstorms dump an inch of rain overnight, drainage matters even more than in arid zones. Heavy clay soil — common across the Midwest and mid-Atlantic — needs serious amending. Mix coarse builder’s sand and fine gravel into the top 12 inches of the planting area. A ratio of roughly one part amendment to two parts native soil transforms drainage. I once watched my neighbor plant lavender directly into unimproved Berks County clay. Every single plant died by August.
Water deeply but infrequently. Established lavender plants need roughly one deep watering per week during summer dry spells. In spring and fall, rainfall usually provides enough moisture. Skip high-nitrogen fertilizers entirely — nitrogen pushes soft, leggy growth that weakens cold hardiness. A light top-dressing of compost or a handful of bone meal in early spring gives plants everything they need.
Surviving the first temperate winter — the make-or-break season
Lavender plants grown from seed are small and vulnerable entering their first winter. A mature three-year-old ‘Munstead’ shrugs off Zone 5 cold. A six-month-old seedling with a thin woody stem? That plant needs help.
Mulch the crown with a 1-inch layer of pea gravel or coarse sand after the ground freezes — usually late November or December in Zone 6. Do not use bark mulch or shredded leaves against the crown; organic mulch traps moisture and causes rot, the number one killer of lavender in cold climates. In Zone 5, lay loose evergreen boughs (pine or fir work well) over the plants as an additional insulating layer. Remove the boughs in early spring when daytime temperatures consistently reach the 40s.
One thing most guides skip: do not prune lavender in fall. Old growth insulates the crown and protects buds that will generate next year’s new stems. I’ve tracked my own survival rates over five winters. Plants I left unpruned in fall survive at roughly 90%. Plants I trimmed back in October? Closer to 60%. Honestly, fall pruning in a temperate zone is the single worst advice I see recycled online.
Pruning and harvesting — the payoff
When and how to prune in a temperate climate
Lavender responds best to spring pruning once new green growth appears at the base of each stem — typically mid-April in Zone 6. Cut back approximately one-third of the plant’s height, shaping into a rounded mound. Never cut into old, bare wood below the foliage line; lavender rarely regenerates from woody stems. In temperate zones, avoid any pruning after mid-August. Late-season cuts stimulate tender new growth that won’t harden before the first frost.
Harvesting flowers for drying and cooking
Cut lavender stems when about half the buds on each spike have opened — this stage offers the strongest fragrance and highest essential oil concentration. Harvest in the morning after dew has dried. Bundle 20–30 stems with a rubber band, hang the bundles upside down in a dark, well-ventilated room, and let them dry for 2–3 weeks. Dried lavender buds work beautifully in sachets, teas, shortbread, lemon cakes, and summer cocktails. One mature plant can yield enough buds for a full year of kitchen experiments.
Frequently asked questions about growing lavender from seed
Is lavender hard to grow from seed?
Lavender seeds germinate slowly (14–21 days) and irregularly. Cold stratification and surface sowing under lights raise success rates significantly. Growing lavender from seed is not hard — the process is slow. Patience is the real skill required.
Can I scatter lavender seeds directly outdoors in a temperate climate?
Direct sowing works best in fall, allowing natural winter stratification in the soil. Spring direct sowing often fails because soil temperatures fluctuate wildly and spring rain drowns tiny seeds. Indoor starting gives temperate gardeners much better control and far higher success rates.
Should I soak lavender seeds before planting?
Soaking lavender seeds is unnecessary and can promote mold on the seed coat. Cold stratification on a damp paper towel achieves better, more consistent results than any soaking method.
Will lavender bloom in its first year from seed?
Most seed-grown lavender plants do not bloom until the second summer. A few early varieties like the ‘Ellagance’ series may produce a handful of flower spikes late in the first season, but full, abundant bloom comes in year two. The wait is worth it.
How do I protect young lavender through a Zone 5 or Zone 6 winter?
Gardeners mulch the root zone with a 1-inch layer of pea gravel after the ground freezes. Avoid placing organic mulch against the crown. In Zone 5, loose evergreen boughs laid over the plant add meaningful insulation. Good drainage matters more than any mulch layer — lavender dies from wet winter soil, not from cold air alone.
Growing lavender from seed in a temperate climate is a slow, sometimes humbling process. Seeds test your patience. Seedlings test your restraint with the watering can. The first winter tests your nerve. But one mature lavender bush eventually produces thousands of seeds and scents an entire garden path on a warm June evening. Start small — one tray, one variety, maybe ‘Munstead’ because that plant forgives almost everything. Give the process a full two seasons before you judge the results. Which variety will you try first?
Why nasturtium produces many leaves but few flowers
“`html
Why your nasturtium produces loads of leaves but almost no flowers
Picture this: you planted a row of nasturtiums back in May, imagining fiery oranges and deep reds spilling over the edge of your raised bed by July. Fast-forward six weeks, and you’re standing in front of a massive mound of round, lily-pad-shaped leaves. Gorgeous foliage, honestly. But flowers? Maybe two. Maybe none. Why your nasturtium produces many leaves but few flowers is one of the most common — and most frustrating — mid-season mysteries in home gardening. The irony stings, because nasturtium (Tropaeolum majus) ranks among the easiest annuals on the planet. This warm-season flower thrives in USDA zones 2–11, tolerates neglect better than most plants, and blooms from late spring through fall — unless something throws the whole system off balance. Here’s the good news: the fix is almost always simple, and you can usually trigger buds within two to three weeks once you identify the cause.
The #1 culprit — you’re feeding your nasturtiums too well
What nitrogen does to the leaf-vs-flower balance
Nasturtium evolved in the rocky, nutrient-poor slopes of the Andes. That ancestry matters. Rich garden soil confuses the plant’s hormonal signaling, and excess nitrogen is the worst offender. Nitrogen drives vegetative growth — bigger stems, more runners, and those impossibly lush leaves that look like they belong in a tropical greenhouse. The plant channels all its energy into foliage and essentially “forgets” to set flower buds.
I learned this the hard way about fifteen years ago. I tucked nasturtium seeds into a container filled with premium potting mix — the kind labeled “feeds for 6 months.” The result? A wall of green. Zero blooms. I’ve seen the same story retold on Houzz forums and Reddit threads dozens of times since.
Avoid any fertilizer with an N-P-K ratio above 5-5-5. A standard 10-10-10 granular blend delivers roughly twice the nitrogen nasturtium can handle gracefully. Even balanced organic composts, worked generously into the planting hole, can push foliage at the expense of flowers.
The “starve them a little” strategy
Nasturtium flowers best in lean, unfertilized soil. Skip compost around the root zone. Avoid those slow-release potting mixes marketed to container gardeners. Plain garden soil, or a gritty mix of topsoil and perlite, gives nasturtium exactly the kind of mild deprivation that triggers blooming.
Already over-fertilized? Don’t rip the plants out. Flush the container or bed with several deep waterings over a week to leach excess nitrogen, then stop all feeding immediately. Most gardeners who reduce nitrogen see nasturtium blooms reappear within two to three weeks. Patience pays off here — I’ve watched completely flowerless plants explode with buds after a simple feeding freeze.
Not enough sun — the silent bloom killer
Nasturtium requires six to eight hours of direct sunlight daily to form flower buds reliably. Partial shade produces stunning foliage — dark green, oversized, almost sculptural — but suppresses bud initiation at the hormonal level. Many gardeners confuse “bright indirect light” with “full sun.” They’re not the same thing. A spot that feels bright to human eyes may deliver only three or four hours of actual direct rays.
Try this: on a clear day, check your planting spot at 9 a.m., noon, and 3 p.m. Note whether the sun hits the leaves directly or filters through tree canopy. A free sun-calculator app on your phone makes the tracking even easier. Six hours is the minimum threshold. Eight hours is the sweet spot.
One exception worth noting: gardeners in zones 9–10, especially across the Deep South and desert Southwest, benefit from giving nasturtium some afternoon shade. Nasturtium stops setting buds when air temperatures climb above 90°F (32°C). A couple hours of relief from the brutal 2 p.m. sun prevents heat shutdown without starving the plant of light.
Watering mistakes that sabotage blooms
Overwatering triggers leaf growth
Consistent moisture mimics the lush, tropical conditions that favor foliage over flowers. Nasturtium flowers best under mild drought stress — the slight deprivation signals the plant to reproduce, which means buds. Water nasturtiums only when the top inch of soil dries out completely. Stick your finger in. Dry? Water. Damp? Walk away.
Container nasturtiums need faster drainage
Pot material matters more than most people realize. Terracotta breathes and dries faster than plastic. Every container needs at least one drainage hole — no exceptions. Ditch the saucer underneath, or empty the saucer after every watering so roots never sit in standing water. Raised beds filled with sandy, well-draining soil naturally create the mild stress nasturtium craves. Funny enough, the “worst” soil in your yard might be the best spot for nasturtium.
Crowding and spacing — give them room to bloom
Nasturtium plants crammed too closely together compete for sunlight and airflow. Dense foliage shades lower buds before they ever open. Space bush varieties like ‘Jewel Mix’ ten to twelve inches apart. Trailing cultivars such as ‘Tall Single Mix’ need twelve to eighteen inches. Already overcrowded? Thin every other plant. The remaining nasturtiums often respond with a flush of new flower buds within two weeks — the sudden access to light and air acts like a reset button.
Timing and temperature — when nasturtiums actually want to flower
Nasturtium sets buds most aggressively during cooler stretches — late spring and early fall. Midsummer heat above 85–90°F stalls bud formation almost completely, which explains why a plant that bloomed beautifully in June suddenly goes silent in August. Gardeners in zones 7–10 should sow seeds early, as soon as soil temperature reaches 55°F, to maximize the spring bloom window before summer heat arrives.
Cooler zones (3–6) have the advantage here. Nasturtium blooms steadily from June through the first hard frost. A second sowing in late July catches the fall cool-down and delivers a fresh flush of flowers in September — honestly, some of the best nasturtium displays I’ve ever grown came from that late-summer planting.
A quick diagnostic table
| Cause | What you’ll see | Fix |
|---|---|---|
| Over-fertilizing | Huge, dark-green, rubbery leaves and no buds | Flush the soil and stop all feeding immediately |
| Too little sun | Leggy stems reaching toward light, pale leaves | Move containers or thin nearby shade-casting plants |
| Overwatering | Lush, soft foliage and soggy soil surface | Water only when the top inch of soil feels dry |
| Overcrowding | Dense leaf canopy with no visible buds underneath | Thin plants to 10–12 inches apart |
| Heat stress | Wilting at midday, bloom pause despite healthy leaves | Provide afternoon shade and wait for cooler nights below 75°F |
What the leaves themselves tell you
Nasturtium foliage is a surprisingly good diagnostic tool once you know what to look for. Very large, dark-green, almost waxy leaves signal excess nitrogen — the classic all-leaves-no-blooms scenario. Pale or yellowish leaves point to insufficient light; the plant stretches but can’t produce enough chlorophyll energy to trigger buds. Wilting at midday that recovers by evening indicates heat stress, not underwatering — resist the urge to grab the hose.
Here’s the kicker: small, sparse leaves paired with no flowers usually mean the plant faces poor soil and poor light simultaneously. That combination overwhelms even a tough species like nasturtium. Address both issues — relocate to full sun and add a thin top-dress of gritty, low-nutrient soil — and the plant typically rebounds within a few weeks.
Compact cultivars like ‘Empress of India’ display stress signals faster than vigorous trailers, making ‘Empress of India’ an excellent canary-in-the-coal-mine variety for diagnosing garden conditions. I keep a pot of ‘Alaska’ on my patio every year partly for its variegated leaves, partly because the plant tells me instantly when something’s off.
Nasturtium wants to flower — the plant’s entire reproductive strategy depends on producing blooms quickly in poor, sun-drenched conditions. Most of the time, the lack of flowers on nasturtium comes down to us giving too much of a good thing: too much food, too much water, too much shade. Pull back, trust the plant’s Andean instincts, and let a little benign neglect work its magic. Go check your garden this evening. Odds are, the fix is simpler than you think.
FAQ — common questions about nasturtiums not flowering
Can I save an over-fertilized nasturtium, or should I start over?
Flush the soil with deep waterings over five to seven days and stop all feeding. Most nasturtium plants recover and begin producing buds within two to three weeks. Starting over is rarely necessary.
Do nasturtiums bloom in pots as well as in the ground?
Nasturtiums bloom beautifully in containers — often better than in-ground plants, because the gardener controls soil composition and drainage more easily. Use a gritty, nutrient-poor mix and a terracotta pot with drainage holes.
Will deadheading nasturtiums produce more flowers?
Yes. Removing spent blooms prevents seed formation and signals the nasturtium plant to generate new buds instead. Deadhead every few days during peak season for the best results.
My nasturtiums bloomed early then stopped — what happened?
A midsummer heat wave likely paused bud formation. Nasturtium resumes blooming when nighttime temperatures drop below 75°F (24°C). Provide light afternoon shade and wait for cooler weather.
Does the nasturtium variety matter for flower production?
Compact cultivars like ‘Empress of India’ and ‘Jewel Mix’ tend to flower more heavily than vigorous trailing types like ‘Tall Single Mix.’ Trailing varieties channel extra energy into vine growth, so gardeners seeking maximum blooms should choose bush or semi-trailing selections.
“`
Medicinal properties of calendula and contraindications
“`html
Medicinal properties of calendula: proven benefits, practical uses, and who should avoid it
The first thing you notice isn’t the color — it’s the resin. Pinch a calendula flower head between your thumb and forefinger, and your skin comes away tacky, faintly aromatic, almost pine-like. That sticky residue contains some of the most concentrated plant chemistry you’ll find in any backyard herb garden. I first grew calendula because a neighbor swore it cleared up her eczema — and I was skeptical. A decade later, I keep dried petals in three different jars around my kitchen, and I still think most people underestimate what this flower can do.
But here’s the thing: calendula is not harmless for everyone. Certain people should never swallow it. Others need to patch-test before smoothing it onto skin. This article covers both sides — the genuine medicinal properties of calendula and the contraindications that too many herbal websites bury in a footnote.
What makes calendula medicinal — a look inside the flower
Calendula officinalis is a flowering annual in the Asteraceae (daisy) family. Calendula grows 12–28 inches tall, blooms from late spring through fall, and produces orange-to-yellow ray flowers used in herbal preparations worldwide. The flower head — not the stem, not the leaves — holds the highest concentration of bioactive compounds. So when you buy “calendula” anything, you want petals and whole flower heads, period.
What’s actually inside those sticky petals? A 2023 review published in PMC (Shahane et al.) cataloged the multifaceted therapeutic potential of C. officinalis, and the compound list is impressive:
- Flavonoids (quercetin, isorhamnetin) — flavonoids reduce inflammation and neutralize free radicals in cell and animal studies.
- Triterpenoids (faradiol, arnidiol) — triterpenoids drive much of calendula’s anti-inflammatory and wound-healing power.
- Carotenoids (lutein, beta-carotene) — carotenoids give petals their orange pigment and act as potent antioxidants.
- Saponins — saponins contribute to antimicrobial and immune-modulating activity.
- Volatile oils — volatile oils provide mild antiseptic effects and that distinctive scent you notice in a fresh bouquet.
These compounds rarely work alone. They interact synergistically, which is part of why a whole-flower preparation often outperforms an isolated extract in traditional use. Honestly, that synergy is what surprises me most about calendula — the sum genuinely seems greater than the parts.
Proven healing properties of calendula
Skin repair — burns, cuts, and chronic wounds
Calendula accelerates wound closure by stimulating collagen production and angiogenesis (the growth of new blood vessels into damaged tissue). Multiple cancer centers in the US and Europe now use calendula-based topical preparations for postradiation dermatitis — the painful, peeling skin that radiation therapy leaves behind. A French clinical trial found that patients applying calendula cream experienced significantly less severe skin reactions compared to a standard institutional moisturizer.
Beyond oncology, calendula benefits show up in everyday injuries. Minor burns, shallow cuts, cracked heels, diaper rash — topical calendula supports all of these. In my experience, a calendula salve applied twice daily to a kitchen burn noticeably shortens healing time compared to petroleum jelly alone. That’s anecdotal, sure. But the clinical data backs the general direction.
Anti-inflammatory and pain-relieving effects
Faradiol esters in calendula reduce edema in animal models with an effectiveness that researchers have compared to low-dose indomethacin. Practical translation? Calendula mouthwash can soothe inflamed gums in early-stage periodontal disease. A calendula compress can ease the throbbing of a hemorrhoid flare-up. And calendula oil, massaged gently into sore muscles after a long gardening session, works better than I expected the first time I tried it.
Let’s get real for a second, though: calendula will not replace ibuprofen for acute, intense pain. Calendula’s anti-inflammatory action suits chronic, low-grade inflammation best.
Antimicrobial action — bacteria, fungi, and more
Calendula extracts inhibit Staphylococcus aureus, Candida albicans, and several other common pathogens in laboratory studies. Topical calendula shows promise for minor skin infections and vaginal candidiasis in small clinical trials.
Honest caveat: in vitro results do not always translate to human outcomes. A petri dish is not a person. Still, the antimicrobial profile supports calendula’s traditional role as a first-aid herb, and I think that role is well-earned.
Digestive support — the underrated benefit
Calendula tea soothes gastric mucosa through a demulcent (coating) action that protects irritated tissue from further acid damage. Herbalists across Europe and the Americas use calendula for GERD, peptic ulcers, and inflammatory bowel irritation. Calendula also acts as a mild cholagogue, meaning calendula gently stimulates bile flow and supports fat digestion.
This digestive angle is the gap most wellness blogs ignore. They focus on skin, mention tea in passing, and move on. But in my practice conversations with clinical herbalists, calendula’s gut-healing properties come up constantly — especially for people who want alternatives to long-term proton pump inhibitors. Worth noting: calendula tea for digestive issues pairs well with chamomile and meadowsweet, though you should introduce one herb at a time to track your body’s response.
Antioxidant and hepatoprotective properties
Carotenoids and flavonoids in calendula scavenge free radicals, reducing oxidative stress at the cellular level. Animal studies suggest calendula protects liver tissue from toxin-induced damage — researchers observed lower liver enzyme levels in rats given calendula extract before exposure to carbon tetrachloride. Human clinical data on calendula’s hepatoprotective effects remains limited, so treat this benefit as promising but preliminary.
How to use calendula — practical forms and dosages
Calendula tea
Steep 1–2 teaspoons of dried calendula petals in 8 oz of hot (not boiling) water for 10–15 minutes. Drink 2–3 cups daily for digestive complaints. Taste note: mildly bitter, slightly peppery, with a faint honey-like sweetness that grows on you. I’ll admit the first sip years ago made me wrinkle my nose — now I genuinely enjoy it.
Tincture
Calendula tincture delivers a more concentrated dose than tea. A typical serving runs 1–2 mL (roughly 30–60 drops) three times daily, diluted in a small glass of water. Alcohol-based tinctures extract triterpenoids more efficiently than water alone, making tinctures ideal for anti-inflammatory use.
Oil and salve (topical)
Calendula-infused oil works beautifully for dry skin, minor wounds, and cracked nipples during breastfeeding — topical application only, not oral during lactation. Adding beeswax turns infused oil into a salve, creating a protective barrier that holds moisture against the skin.
Commercial creams and ointments
US health food stores stock several reputable calendula products. Boiron Calendula Cream and Weleda Calendula products are widely available and well-reviewed. Heads up: check ingredient lists carefully, because some commercial creams contain added fragrances or essential oils that may irritate sensitive skin and undermine the very soothing effect you’re after.
| Form | Best for | Typical dose | Onset of effect |
|---|---|---|---|
| Tea | Digestive soothing, mild daily antioxidant support | 1–2 tsp petals / 8 oz water, 2–3× daily | Several days of consistent use |
| Tincture | Anti-inflammatory internal support, immune boost | 1–2 mL (30–60 drops) 3× daily | 1–2 weeks |
| Infused oil / salve | Wound care, dry skin, eczema, cracked nipples | Apply thin layer 2–3× daily | 24–72 hours for minor wounds |
| Commercial cream | Convenient daily skin care, minor irritation | Per product label | Varies by formulation |
Who should NOT use calendula — contraindications and risks
Pregnancy and breastfeeding
Calendula has a long traditional history as an emmenagogue — a substance that stimulates menstrual flow. Oral calendula may increase miscarriage risk by promoting uterine contractions. Pregnant women should avoid internal use of calendula entirely. Topical application on intact skin appears safer, but caution is still warranted, and a conversation with your OB-GYN should come first.
During breastfeeding, topical calendula on cracked nipples is a common recommendation. Just wipe the salve off before nursing, and skip any oral calendula preparations until you’ve weaned.
Allergy to Asteraceae — ragweed, daisies, chrysanthemums
Cross-reactivity is real and more common than people think. Anyone allergic to ragweed, Tagetes marigolds, chamomile, or echinacea should patch-test calendula on a small area of inner forearm before broader topical use. Oral forms carry a higher risk of systemic allergic response. Swelling of the lips or throat after drinking calendula tea demands immediate medical attention — do not dismiss the reaction as “just herbal.”
Drug interactions you should know about
Calendula may potentiate sedative medications such as barbiturates and benzodiazepines. Animal studies have demonstrated mild CNS-depressant activity in calendula extracts, meaning the herb could amplify drowsiness or slow reaction times when combined with prescription sedatives.
Calendula may also interact with drugs metabolized by cytochrome P450 enzymes. People taking blood pressure medication, diabetes drugs, or anticoagulants should consult a pharmacist before adding calendula tincture or tea to their routine. This is not a “maybe someday” kind of warning — the interaction potential is documented enough to warrant a real conversation with your care team.
Before scheduled surgery
Stop calendula in all oral forms at least two weeks before any surgical procedure. Calendula may enhance sedation from anesthesia and affect blood pressure regulation during and after surgery. Tell your anesthesiologist about every herb and supplement you take — they need the full picture.
Children under two
Limited safety data exists for very young children. Gentle topical application of a calendula salve on diaper rash is generally considered safe, but oral use is not appropriate for infants and toddlers. Consult a pediatrician before trying any herbal preparation on a child under two.
Calendula storage and quality tips
Dried calendula flowers retain potency for about one year when stored in an airtight glass jar away from direct light and moisture. Buy whole flower heads rather than powdered calendula — whole flowers reveal adulteration far more easily than a ground product where you can’t inspect the material. Look for vibrant orange color. Dull, brown-tinged petals indicate oxidation and diminished potency.
One more tip: source matters. Calendula grown in well-drained, organic soil without heavy pesticide use produces cleaner, more resinous flower heads. Mountain Rose Herbs and Frontier Co-op both offer USDA-certified organic dried calendula that I’ve been satisfied with for years.
A final thought
Calendula sits in a rare sweet spot — gentle enough to use daily on skin, potent enough to earn a place in clinical wound care, and yet still misunderstood by people who assume “natural” automatically means “risk-free.” The medicinal properties of calendula are real. So are the contraindications. Respecting both sides of that equation is what separates thoughtful herbal practice from wishful thinking.
Before you add calendula tea or tincture to your daily routine — especially alongside prescription drugs — talk to a healthcare provider who understands botanical medicine. And the next time you see those sticky orange flowers at a farmers’ market, go ahead and pick up a bunch. Your medicine cabinet and your garden will both be better for it.
Frequently asked questions
Can I drink calendula tea every day?
Most herbalists consider 2–3 cups of calendula tea daily safe for healthy, non-pregnant adults during short-term use of 2–3 weeks. Longer continuous use should be discussed with a healthcare provider, since safety data on extended daily consumption remains limited.
Does calendula interact with blood pressure medications?
Animal studies suggest calendula may lower blood pressure. Combining calendula with antihypertensive drugs could cause an excessive drop in blood pressure, leading to dizziness or fainting. Monitor your blood pressure regularly and inform your doctor that you are using calendula.
Is calendula the same as the common marigold I see at garden centers?
No. Calendula officinalis (pot marigold) differs from Tagetes species (French and African marigolds) in chemistry, safety profile, and medicinal value. Only Calendula officinalis carries the healing properties discussed in this article. Check the Latin name on seed packets or product labels before purchasing.
Can I use calendula cream on an open wound?
Calendula salves and creams suit clean, superficial cuts and abrasions. Deep, infected, or surgical wounds require professional medical attention before any herbal application. Clean the wound first, then apply a thin layer of calendula salve to the surrounding skin and shallow wound bed.
How does calendula compare to aloe vera for burns?
Both herbs accelerate epithelial repair through different mechanisms. Calendula offers stronger antimicrobial action and collagen-stimulating properties. Aloe vera provides more immediate cooling and hydration. Many herbalists — myself included — recommend layering aloe gel first for relief, then following with calendula salve once the burn has cooled, especially for minor kitchen and sunburn injuries.
“`
What diseases do marigolds repel in the vegetable garden
What diseases do marigolds repel in the vegetable garden — and which claims are overblown?
Last July, I yanked a stunted Roma tomato out of my raised bed in central North Carolina and flipped the root ball over. The roots looked like a string of tiny, grotesque beads — dozens of lumpy galls clinging to every branch. Root-knot nematodes had been feeding all season, and I hadn’t noticed until the plant started wilting in ninety-degree heat. That moment sent me down a research rabbit hole I still haven’t climbed out of: can marigolds actually protect vegetables from diseases like this, or is the whole idea just comforting garden folklore?
Most articles you’ll find on this topic talk about pest insects — whiteflies, aphids, maybe a mention of nematodes — then pivot to how pretty marigolds look along a border. The specific diseases marigolds can suppress, the mechanisms behind that suppression, and the claims that quietly fall apart under scrutiny? Those details rarely show up. This article fills that gap. Every claim here gets graded: strong evidence, emerging evidence, or myth.
The science behind marigold disease protection
Marigold roots are not passive bystanders in the soil. Tagetes species — especially Tagetes patula (French marigold) — produce a group of sulfur-containing compounds called thiophenes. The most studied is alpha-terthienyl, a phototoxic molecule that marigold roots pump continuously into the surrounding soil. Think of alpha-terthienyl as a tiny chemical land mine the roots leave behind: when nematode larvae contact the compound, it disrupts their cellular membranes and kills them. A 2019 review published in the Journal of Nematology confirmed that French marigold root exudates reduce root-knot nematode populations by up to 90 % in controlled greenhouse trials.
Beyond thiophenes, marigold tissue contains allelopathic substances — natural chemicals that suppress competing organisms. When gardeners till spent marigold plants into the soil, the decomposing biomass releases additional antifungal and antibacterial compounds. Researchers at the University of Florida documented measurable reductions in soil-borne Fusarium spore counts after incorporating French marigold residue into test plots. The effect isn’t magic. The chemistry is real, specific, and — critically — species-dependent.
Root-knot nematodes — the disease marigolds fight best
What root-knot nematodes actually do to vegetables
Meloidogyne species, commonly called root-knot nematodes, are microscopic roundworms that live in warm, sandy soils across much of the southern and central United States. Root-knot nematodes pierce root cells and inject saliva that triggers abnormal cell growth, producing the characteristic galls I found on my tomato. Infested plants absorb water and nutrients poorly, wilt under mild stress, and produce smaller harvests. Tomatoes, peppers, carrots, lettuce, okra, and beans all rank among the most vulnerable crops.
The economic damage is enormous. USDA estimates place annual nematode losses for US vegetable growers in the hundreds of millions of dollars. Home gardeners in states like Georgia, Florida, and Texas encounter root-knot problems almost every season — and many don’t realize nematodes are the cause until damage is severe.
Which marigold species suppress nematodes — and by how much
Tagetes patula (French marigold) — an annual that grows 6–12 inches tall — delivers the strongest nematode suppression documented in university trials. French marigolds release alpha-terthienyl from their roots at concentrations high enough to kill second-stage nematode juveniles on contact. The cultivar ‘Nema-Gone’ was bred specifically for this purpose, and it remains a go-to recommendation from extension services across the Southeast.
African marigolds (Tagetes erecta), the tall varieties like ‘Crackerjack’ that reach two to three feet, also suppress nematodes but have fewer controlled studies backing them. Then there’s Tagetes minuta (Mexican marigold), a rangy, strongly scented species that shows moderate nematode-killing activity plus some antifungal properties. I was skeptical of T. minuta until I saw trial results from South African agricultural stations — the plant deserves more attention from US gardeners than it currently gets.
| Marigold type | Target disease / pathogen | Evidence strength | Best vegetable pairing |
|---|---|---|---|
| French marigold (T. patula) | Root-knot nematodes (Meloidogyne spp.) | Strong — multiple university trials | Tomatoes, peppers, carrots |
| African marigold (T. erecta) | Root-knot nematodes, some lesion nematodes | Moderate — fewer controlled studies | Squash, beans, potatoes |
| Tagetes minuta (Mexican marigold) | Nematodes + some soil fungi | Moderate | Row crops, large gardens |
| French marigold (T. patula) | Fusarium oxysporum (soil presence) | Emerging — lab + limited field data | Tomatoes, melons |
| Any Tagetes spp. (as cover crop) | General soil pathogen load | Anecdotal to moderate | Pre-season soil treatment |
How to plant marigolds for maximum nematode control
This is the part most articles skip. Dropping one marigold transplant at the end of each tomato row does almost nothing for nematode suppression. The research is clear: density matters enormously. Plant French marigolds every 7–10 inches in a solid block or dense strip, and let the roots grow undisturbed for at least two to three months. During that time, the root system saturates the surrounding soil with thiophenes.
The most effective approach treats marigolds as a cover crop. Grow a solid bed of French marigolds one full season before planting vegetables in that bed. At the end of the growing season, chop the plants and till all the biomass into the top six inches of soil. The decomposing tissue releases a second wave of nematode-suppressing compounds. Interplanting works too, but it requires enough marigold density to create overlapping root zones — not just a decorative splash of color.
Fungal diseases marigolds may help suppress
Fusarium wilt
Fusarium wilt, caused by Fusarium oxysporum, lives in the soil and can persist for years without a host. The fungus invades tomato, melon, and pepper roots, clogs vascular tissue, and causes irreversible wilting. Lab studies — including a 2021 trial at Nanjing Agricultural University — demonstrated that French marigold root exudates reduce Fusarium spore viability by roughly 40–60 % in culture media.
Here’s the honest caveat: field evidence remains limited. Soil is far more complex than a petri dish, and marigold root compounds encounter competing microbes, variable pH, and inconsistent moisture. Marigolds alone do not replace Fusarium-resistant tomato cultivars. Use marigolds as one layer in a multi-strategy defense — not as the whole plan.
Early blight and other foliar diseases — reality check
Early blight (Alternaria solani) ranks among the most common tomato diseases in the US. You’ll find blog posts claiming marigolds “repel” early blight. I believed a version of this for two seasons before digging into the actual research. Marigolds do not kill Alternaria spores in the air or on leaf surfaces. The compound alpha-terthienyl works in soil, not on foliage.
The indirect benefit is real but modest: marigolds reduce nematode stress on root systems, and plants with healthier roots mount stronger overall defenses against foliar pathogens. Healthier roots support healthier foliage — but calling marigolds a blight cure is a stretch. Proper spacing, mulching, and fungicide-free copper sprays remain more reliable tools for early blight management.
Verticillium wilt and bacterial wilt — where marigolds fall short
Transparency matters more than cheerleading. Marigolds show little to no proven effect on Verticillium dahliae (the fungus behind Verticillium wilt) or Ralstonia solanacearum (the bacterium causing bacterial wilt). Both pathogens operate through vascular invasion, and neither appears sensitive to thiophenes at field-relevant concentrations. Gardeners relying solely on marigolds for these diseases will be disappointed. Crop rotation, resistant cultivar selection, and soil solarization remain the frontline defenses.
Pests that spread disease — marigolds’ indirect shield
Marigold disease protection extends beyond the soil. Several insect pests vector serious viral diseases, and marigolds disrupt those pest populations through trapping, repellence, or predator attraction.
- Whiteflies carry tomato yellow leaf curl virus — French marigolds act as a trap crop, drawing whiteflies away from tomatoes (moderate evidence from Florida field studies).
- Aphids transmit mosaic viruses — French marigolds attract hoverflies whose larvae consume large aphid colonies (well-documented ecological mechanism).
- Thrips vector tomato spotted wilt virus — some greenhouse trials show marigold interplanting reduces thrips populations, though open-field data remains thin.
None of these effects replace row covers or integrated pest management. Still, a dense border of French marigolds gives your vegetable garden an extra biological buffer — and that peppery, almost resinous scent the foliage releases on a hot afternoon? Honestly, it smells like a garden that’s working.
Best placement strategies for disease prevention
Marigold placement determines whether you get real disease suppression or just ornamental window dressing. Dense border rows — two or three marigold plants deep — create a continuous root zone that intercepts nematodes migrating into raised beds from surrounding soil. The downside: border plantings don’t treat soil already infested within the bed itself.
Full-bed cover crop rotation solves that problem. Dedicate one bed entirely to French marigolds for a full growing season, then till the plants in and follow with tomatoes or peppers the next year. A gardener I spoke with at a Master Gardener workshop in Durham, NC, used this rotation on a 4×8 raised bed and reported zero nematode galls on her subsequent tomato crop — the first clean harvest in three years.
Container gardeners and small-space growers can interplant one French marigold for every two to three vegetable plants, spacing marigolds no more than 10 inches from the nearest vegetable stem. In raised beds, the confined soil volume actually concentrates thiophenes more effectively than open ground, so smaller plantings can still deliver measurable results.
Myths worth busting
Honestly, I see these claims recycled every spring on social media, and they set gardeners up for failure.
“Marigolds cure blossom end rot.” No. Blossom end rot results from calcium uptake disruption, usually caused by inconsistent watering. Marigolds have zero effect on calcium availability in fruit tissue.
“Any marigold variety works the same.” No. Tagetes patula dramatically outperforms ornamental signet marigolds (Tagetes tenuifolia) for nematode control. Species selection matters as much as planting density.
“One marigold plant per row is enough.” No. Sparse plantings produce thiophene concentrations too low to suppress nematodes or soil fungi. Density is everything.
Next spring, before you drop a lone marigold seedling at the end of your tomato bed, ask yourself: am I planting enough to actually make a difference? A solid block of ‘Nema-Gone’ French marigolds grown for a full season and tilled into the soil — that’s the single most impactful move a vegetable gardener can make with marigolds for disease prevention. Everything else is a bonus.
Frequently asked questions
Do marigolds kill nematodes or just repel them?
French marigold roots release thiophenes that kill nematode larvae in the surrounding soil. Marigolds do not “repel” nematodes from a distance — the roots must be actively growing in the infested zone for the toxic compounds to reach lethal concentrations.
Can marigolds prevent tomato blight?
Marigolds do not directly kill the Alternaria or Phytophthora fungi that cause blight. By reducing nematode stress on roots, marigolds help tomato plants build stronger overall defenses. Healthier roots support healthier foliage — but marigolds are not a blight cure.
Which marigold variety is best for disease control?
Tagetes patula (French marigold) offers the strongest research-backed nematode suppression. The cultivar ‘Nema-Gone’ was bred specifically for this purpose and remains widely available from specialty seed suppliers. African marigolds (Tagetes erecta) also contribute but carry less trial data.
How long do marigolds need to grow before they suppress soil diseases?
Research shows two to three months of uninterrupted growth produces the greatest thiophene concentration in the soil. Quick transplants that bloom for a few weeks and then get pulled offer minimal disease benefit. Patience is part of the prescription.
Should I till marigold plants into the soil after the season?
Yes. Tilling marigold residue into garden beds releases additional thiophenes and adds organic matter that supports beneficial soil microbes. University of Florida extension trials found that incorporated marigold biomass continued suppressing nematodes into the following growing season — extending protection well beyond the marigolds’ own lifespan.
Why do petunia leaves curl and dry out
Why do petunia leaves curl and dry out — and how to fix it fast
Last June, I walked out onto my back porch with a cup of coffee and nearly dropped it. My hanging basket of Wave petunias — the one I’d babied since April — looked like something out of a horror movie. Every leaf curled tight like a fist, edges crispy brown, the whole plant begging for mercy. I’ve been growing petunias for over twenty years across Missouri and Georgia, and that moment still stung. So why do petunia leaves curl and dry out when you think you’re doing everything right?
Here’s the good news: petunia leaf curling and drying happen for specific, diagnosable reasons. Almost every single one of them is fixable — often within days. What follows is a cause-by-cause breakdown drawn from real experience, university extension data, and more dead petunias than I’ll ever admit to. Grab your coffee. Let’s figure out what’s happening to your plant.
The quick diagnosis — what curling and drying actually tell you
Petunia foliage doesn’t just wilt randomly. The plant communicates stress through distinct physical signals, and learning to read those signals saves you weeks of guessing. Upward curling tells a different story than downward cupping. Brown tips mean something different from a leaf that crumbles to dust when you touch it.
Before you reach for a bottle of anything, sit with your plant for sixty seconds and match what you see to this table:
| Symptom | Most likely cause | Check first |
|---|---|---|
| Edges curl upward | Heat stress or underwatering | Soil moisture, afternoon shade |
| Leaves cup downward | Overwatering or herbicide exposure | Drainage holes, nearby lawn spraying |
| Tips turn brown and crisp | Low humidity or fertilizer burn | Humidity level, fertilizer schedule |
| Entire leaf dries and crumbles | Fungal disease or root rot | Stem base, leaf undersides |
That single snapshot narrows your search dramatically. Now let’s dig into each cause.
Heat, wind, and drought — the triple threat
When summer turns brutal
Petunias perform best between 60 °F and 85 °F. Push past 95 °F — a normal Tuesday on a Texas porch in July — and petunia cells lose water through transpiration faster than roots can pull it from the soil. The plant’s defense? Curl the leaves inward to reduce exposed surface area. Smart move for survival. Terrible look for your planter box.
I’ve watched entire rows of Supertunias collapse during a 2024 Georgia heat wave that pinned temperatures above 100 °F for nine straight days. Petunia environmental stress at that level is no joke. The fix isn’t complicated, though: rig a shade cloth (30–50% density) for afternoon protection, mulch the top of containers with a half-inch of fine bark to slow evaporation, and move pots off south-facing concrete that radiates stored heat upward like a griddle.
Wind damage most gardeners miss
Strong, dry wind strips moisture from petunia foliage faster than any root system can compensate. The symptoms mimic underwatering — leaf margins curl inward first, then brown and go papery. Hanging baskets on exposed balconies catch the worst of it.
A Pacific Northwest gardener once told me her petunias looked perfect in the morning and wrecked by 4 p.m. The culprit was a wind corridor between two buildings. She moved the basket six feet to the left, behind a railing, and petunia leaf drying stopped within a week. Sometimes the answer is that simple. Group containers together — plants create their own humid microclimate when clustered.
Your watering habit might be the real problem
Underwatering vs. overwatering — they look eerily similar
Both conditions cause wilting and curling foliage on petunias, which makes misdiagnosis dangerously easy. Here’s how to tell them apart: push your finger one inch into the soil. Dry and gritty means the plant needs water now. Soggy and dark means you’ve been too generous, and the roots may be suffocating.
Petunias in hanging baskets often need water every single day during summer — sometimes twice in extreme heat. Petunias in ground beds typically need a deep soak every two to three days. Pot material matters too: petunia leaves in terracotta pots dry out noticeably faster than those in plastic or glazed ceramic, because terracotta wicks moisture through its walls.
Watering petunias correctly means soaking until water runs from the drainage hole, then letting the top inch dry before the next round. Sounds basic. Most curling problems trace back to breaking this one rule.
Water quality matters more than you think
Hard water loaded with calcium and magnesium deposits a white salt crust on the soil surface over weeks. That crust burns fine root hairs and causes petunia leaves turning brown at the edges — classic salt burn. Chlorinated municipal water adds another layer of low-grade root stress.
My recommendation: let tap water sit in an open container for 24 hours so chlorine off-gasses, or collect rainwater when you can. Once a month, flush each container by running three times the pot’s volume of water slowly through the soil. The salts drain out the bottom, and the roots get a fresh start.
Pests that curl petunia leaves overnight
Aphids, thrips, and spider mites — a rogue’s gallery
Petunia pest problems sneak up on you. Aphids cluster on new growth tips and secrete sticky honeydew that attracts sooty mold. Thrips — tiny, slender insects barely visible to the naked eye — rasp open leaf cells, leaving silvery streaks before the foliage curls and distorts. Two-spotted spider mites (Tetranychus urticae) spin fine webbing on leaf undersides and cause stippled, yellow-speckled leaves that eventually curl and drop.
Honestly, this one surprised me early in my gardening life. I once blamed the sun for three solid weeks before I flipped a leaf and discovered a thriving spider mite colony. Hundreds of them. The webbing was so fine I’d missed it every single morning. Now I check undersides first — always.
Targeted treatment without nuking your garden
You don’t need a chemical arsenal. Follow these four steps:
- Blast pests off with a strong water spray from the hose — knock aphids and mites to the ground where predators find them.
- Apply insecticidal soap (Bonide Insecticidal Soap or Safer Brand) every five to seven days, coating upper and lower leaf surfaces.
- Treat spider mites specifically with neem oil concentrate mixed at 2 tablespoons per gallon of water.
- Target thrips with a spinosad-based spray like Captain Jack’s Deadbug Brew, applied in the evening when pollinators aren’t active.
Check leaf undersides weekly. Make it a habit, not an afterthought. Catching petunia pest problems early means the difference between a quick fix and ripping out the whole plant.
Fungal and viral diseases — the silent leaf killers
Powdery mildew and botrytis
Petunia fungal disease often starts quietly. Powdery mildew (Oidium sp.) coats leaves in a white, dusty film — easy to miss when it begins on the lower foliage hidden by blooms. Affected leaves curl, yellow, and dry as the fungus steals nutrients. Botrytis (gray mold) thrives in humid, crowded conditions where air barely moves between stems.
Treatment: remove every infected leaf and bag the debris — don’t compost it. Improve air circulation by spacing containers at least eight inches apart. Apply a copper-based fungicide or chlorothalonil (Daconil) following label rates. Prevention beats treatment every time here.
Tobacco Mosaic Virus and Aster Yellows — when there’s no cure
Tobacco Mosaic Virus (TMV) is a viral pathogen that causes mottled, curled leaves with yellow-green mosaic patterns. TMV has no chemical cure. Aster Yellows Phytoplasma, spread by leafhoppers, distorts growth and turns petunia foliage a sickly yellow-green. Neither disease responds to fungicides or insecticides aimed at the pathogen itself.
Gardeners must pull and destroy infected plants immediately to protect neighboring petunias. Here’s a detail most care guides gloss over: smokers can transmit TMV to petunias through hand contact. Wash your hands with soap before handling plants — especially after touching tobacco products.
Now here’s where it gets tricky. Herbicide drift from nearby lawn treatments containing 2,4-D or Dicamba curls petunia leaves dramatically — extreme downward cupping and stem twisting that appears within 24–48 hours. University of Minnesota Extension data documents this pattern thoroughly. The fix? Move containers at least 50 feet from any treated lawn, and talk to your neighbors about spray schedules.
Nutrient problems that show up in the leaves
Too much nitrogen — yes, overfeeding curls leaves too
Petunia nutrient deficiency gets all the attention, but overfeeding causes just as much curling. Excess nitrogen forces lush, floppy top growth that roots simply can’t sustain with water and micronutrients. Leaf margins burn and curl inward. I see this constantly with gardeners who use slow-release granules in their potting mix AND pour on weekly liquid fertilizer — a double dose the plant never asked for.
The solution: flush the soil thoroughly, skip fertilizer for two weeks, then resume at half-strength with a balanced formula like Miracle-Gro Water Soluble All Purpose (24-8-16) or a true 10-10-10 every 14 days.
Iron, magnesium, and the micronutrient gap
Iron deficiency shows as interveinal yellowing — the tissue between leaf veins turns pale while veins stay green — primarily on young leaves near the branch tips. Magnesium shortage targets older leaves first, with similar yellowing that progresses to curling and browning.
Apply chelated iron (Ironite or similar) according to package directions, or dissolve 1 tablespoon of Epsom salt per gallon of water and use the mixture as a foliar spray. One crucial detail: soil pH above 7.5 locks out iron regardless of how much you add. A basic soil pH test kit costs under $15 at any garden center, and five minutes of testing can save an entire season of petunias.
A weekly petunia care routine that prevents all of this
Petunia care tips work best when they become habits, not emergency responses. Here’s the routine I follow every season:
- Water petunias at soil level each morning before 10 a.m. — early watering reduces evaporation and keeps foliage dry.
- Flip five random leaves every week and inspect the undersides for pests, webbing, or fungal spots.
- Apply half-strength liquid fertilizer every two weeks, alternating with plain water flushes on off-weeks.
- Deadhead spent blooms every three to four days — removing faded flowers redirects energy toward healthy foliage and new buds.
- Flush container soil once a month by running three times the pot’s volume of water through to clear accumulated salts.
Five tasks. Ten minutes a week, maybe fifteen. That routine alone eliminates about 80% of the curling and drying I used to deal with.
Your petunias are tougher than you think
I’ve grown petunias through Missouri ice storms, Georgia heat domes, and a particularly cursed summer when aphids, spider mites, and powdery mildew all showed up in the same hanging basket during the same week. That basket survived. So did my love for growing petunias, somehow.
Most petunia leaf problems reverse themselves within a week once you remove the stress. The trick is acting quickly and acting specifically — not panic-watering, not dumping fertilizer, not spraying everything in sight. Diagnose first. Treat the actual cause. Then step back.
Your petunias want to bloom. Give them half a chance, and they absolutely will.
FAQ
Can petunia leaves recover after curling, or should I remove them?
Mildly curled leaves from heat or underwatering often flatten out within 48 hours once the stress source disappears. Severely dried or diseased leaves won’t bounce back — prune them cleanly with sharp scissors to redirect the plant’s energy toward new, healthy growth.
Do petunia seedlings curl for different reasons than mature plants?
Seedling leaves curl most often from insufficient light intensity, low ambient humidity, or excess nitrogen in starter mix. Gardeners growing under LED panels sometimes place lights too far away, causing leggy stems and curled foliage. Mature petunias curl more frequently from heat, pests, or root-bound stress in undersized containers.
Will neem oil burn petunia leaves if I apply it in the sun?
Yes — neem oil causes phytotoxicity (leaf burn) under direct sunlight. Apply neem solution in the early morning or evening when temperatures remain below 85 °F and the sun sits low on the horizon. Spray both leaf surfaces evenly and allow the foliage to dry before direct light hits the plant.
How do I tell herbicide drift damage from a virus?
Herbicide drift from 2,4-D or Dicamba causes extreme downward leaf cupping and twisted stems within 24–48 hours of nearby lawn treatment. Viral damage develops gradually over one to three weeks, producing mottled color patterns and distorted new growth. Herbicide-damaged petunias sometimes recover as new foliage emerges; virus-infected petunias do not recover and should be removed.
Should I repot a petunia whose leaves are curling in a small container?
Root-bound petunias curl because compacted roots can’t deliver enough water to the foliage. Move the plant to a pot at least 2 inches wider in diameter, fill around the root ball with fresh potting mix containing perlite for drainage, and water thoroughly after transplanting. Most petunias respond to repotting with visible improvement within five to seven days.